Replacing shock bushings
Can you feel any play or movement in the pivots or ‘rear end’ of your mountain bike? It's time to replace your bushings.
More than likely, if there is any movement in the rear end it will be caused by worn shock bushings and/or reducers. Often made from steel with a nylon/PTFE coating, the bushings inside the eyelets of your rear shock are designed to wear over time, but they are an easily replaceable part with the right tools and a little care. See our steps below that identify some of the common types of bushings and reducers, and how you can replace them to eliminate that annoying, and performance affecting play.
1.Bushing wear Identification
On the Left you will see a brand new unused DU bushing. On the right is a bushing that is just eight months old, and you may notice it has much of it’s inner PTFE coating worn off.
2) Bushing service tools
Bushing Installation and Removal Tools – Both Fox and RockShox sell these great ‘push and receive’ style bushing tools that can be used to properly remove the DU bushings from the shock eyelets. Fox’s tool mounts into a vise, and the RockShox tool can be used with either a vice or shop wrenches.
3) Removing a worn DU bushing
Above you can see a worn DU bushing in the eyelet of this Fox Shock.
Using the bushing tool and a bench mounted vice, remove the old bushing by squarely driving it out into the tool’s receiving end. You can see how the tool ‘pushes’ the DU bush into the ‘receiving’ end of the tool without damaging the shock eyelet inner surfaces.
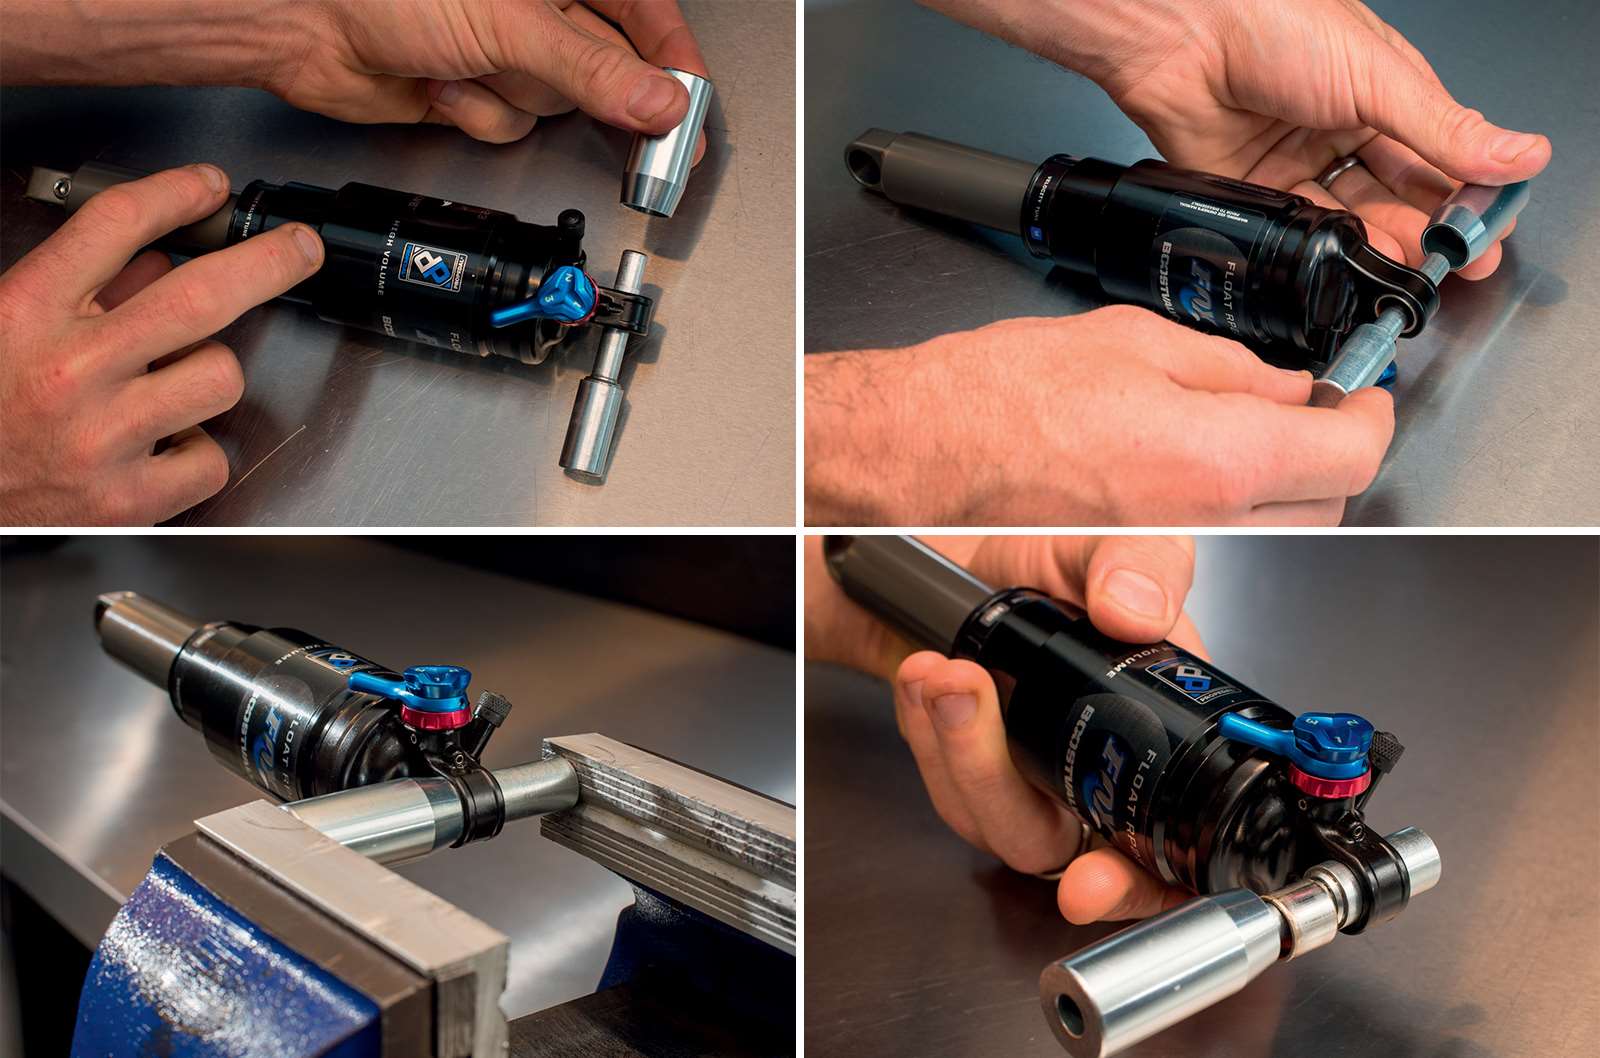
4) Removing a worn nylon flanged bushing
You can use a small flat headed screwdriver to carefully lever the nylon bush out from the eyelet OR, use a small punch to drive them out from the centre. Hold the shock steady and use caution to avoid slipping with the tool and damaging the shock’s damper body.
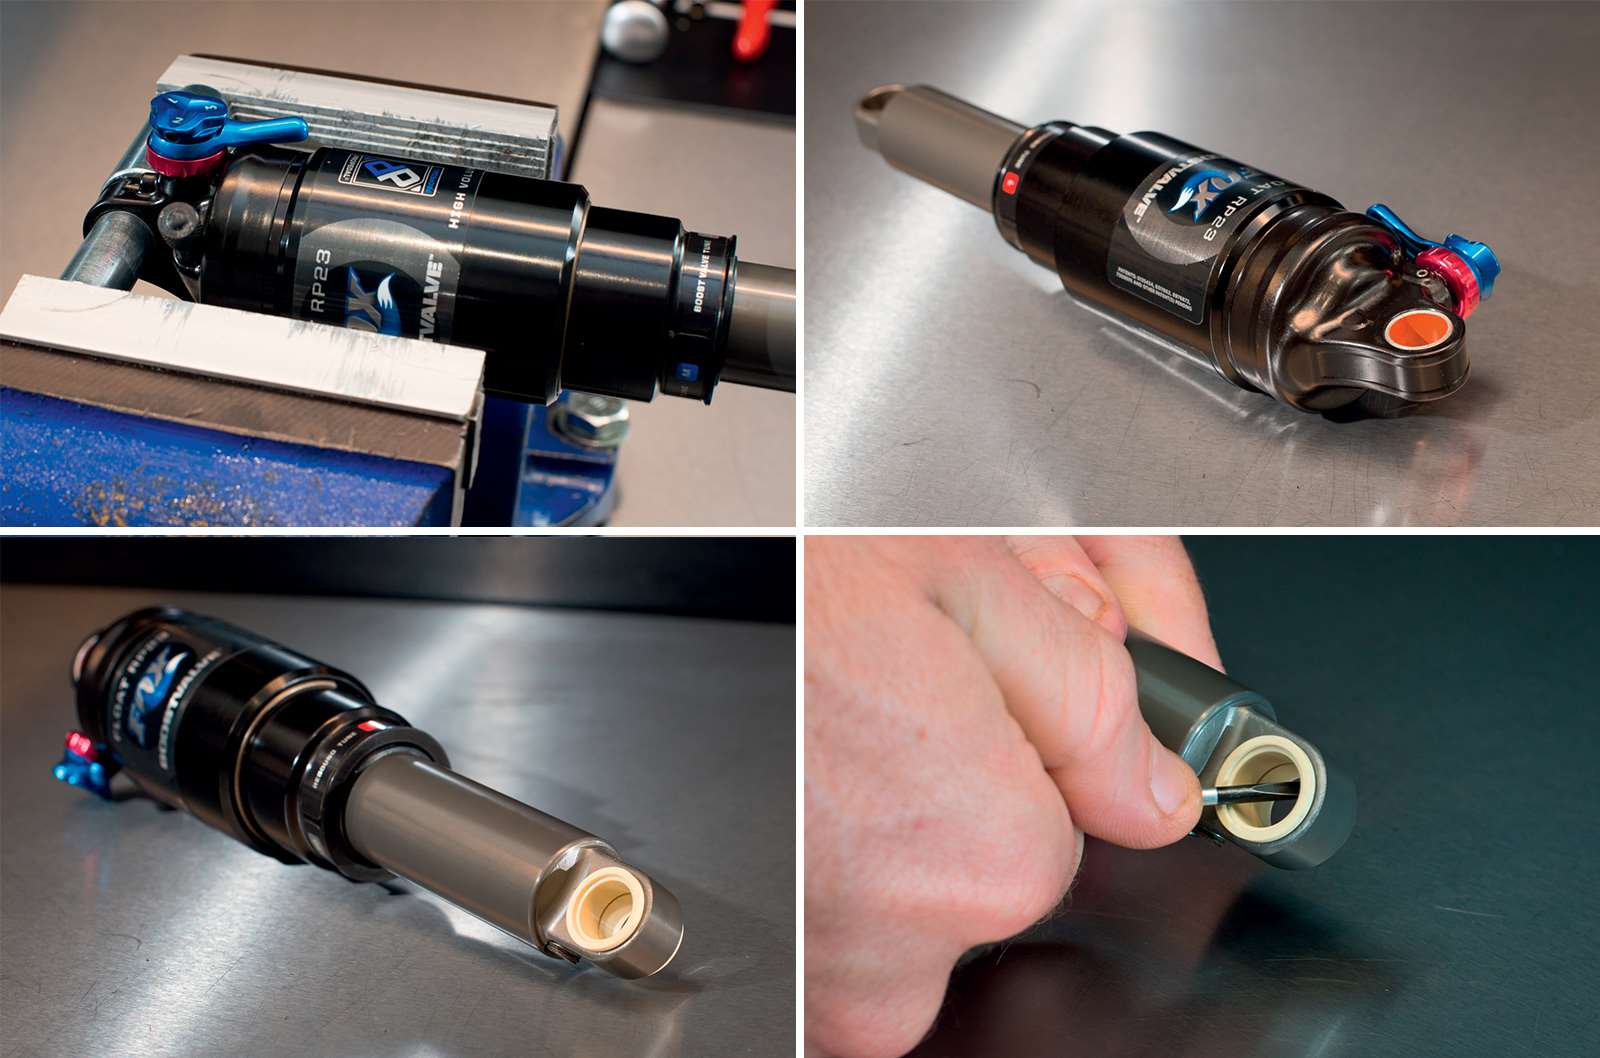
Installation
For installation of the new DU, the procedure is the same, however you can reverse the ‘receiving’ end of the tool so that when you drive the new DU bushing into the eyelet, it will sit snug and flush with the other end. When properly installed, the DU bushing should not protrude outside the shock eyelet.
4.1 The new DU bushing properly installed.
4.2 New Nylon flanged bushings are installed. Nylon bushings can be pressed into the empty shock eyelet with a soft jaw vice.
Important note – Do not use any form of grease, locking compound or lubricant in your shock’s eyelets or bushings. This will attract dirt and or contaminate the PTFE coating and dramatically reduce the life of the bushings.

5) Reducer and shock hardware wear Identification
Reducers – Left (new), Right (8 months old). While reducers will sometimes last many sets of DU bushings before they need to be replaced, it is important to check that they sit tight inside the DU bushings, especially when the bushings are new. If they press into a newly inserted DU bush with little to no effort or force – your reducers are likely to be worn and will need replacing. Also, if the centre hole through the reducers is showing any sign of wear or ovalisation – they will require replacement.
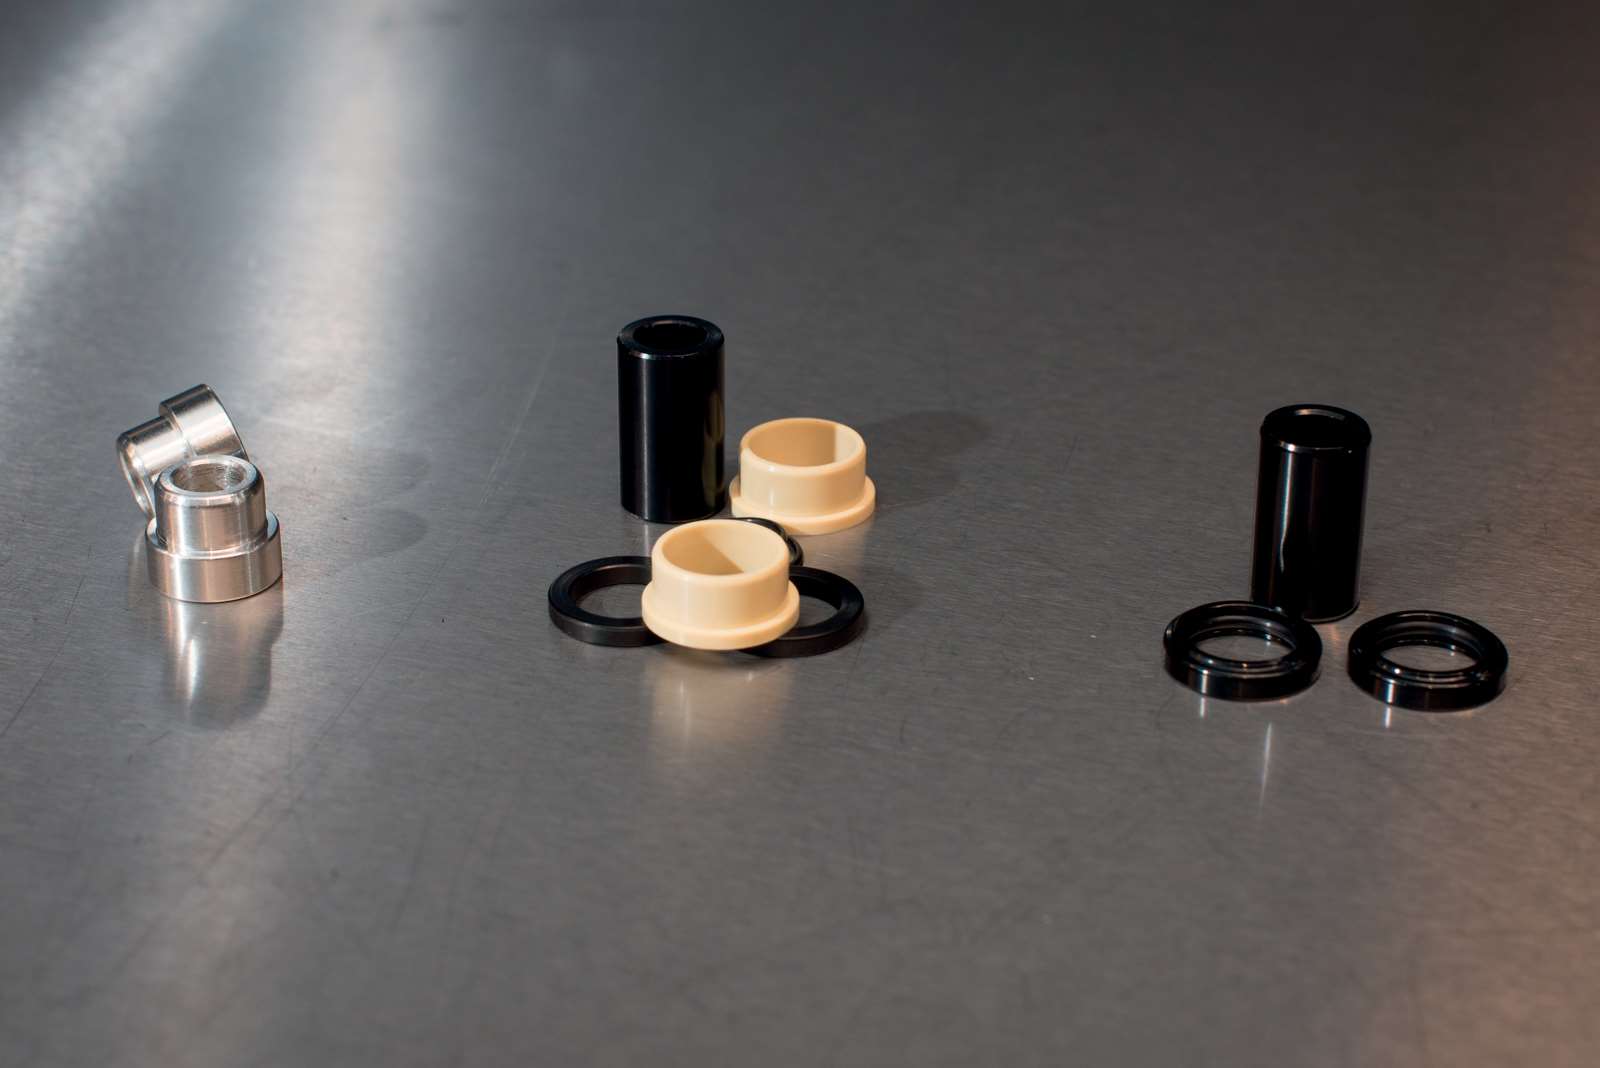
6) Reducer / shock hardware types
Here are the three common styles of mounting hardware found on the majority of mountain bikes.
From Left to right – 2 Piece alloy, 5 piece with Nylon flanged DU, 3 piece alloy.
All three will come in several overall widths, and in varying inner thru axle diameters for your shock mounting bolts.
When you have replaced the bushings, press the shock mounting hardware back into the DU bush or nylon-flanged bush for installation back onto the bike. Follow this simple maintenance procedure and eradicate those annoying clunks or knocks from that rear end.
Words and photos: Aiden Leffman