Words: Jared Rando
Photos: Nick Waygood
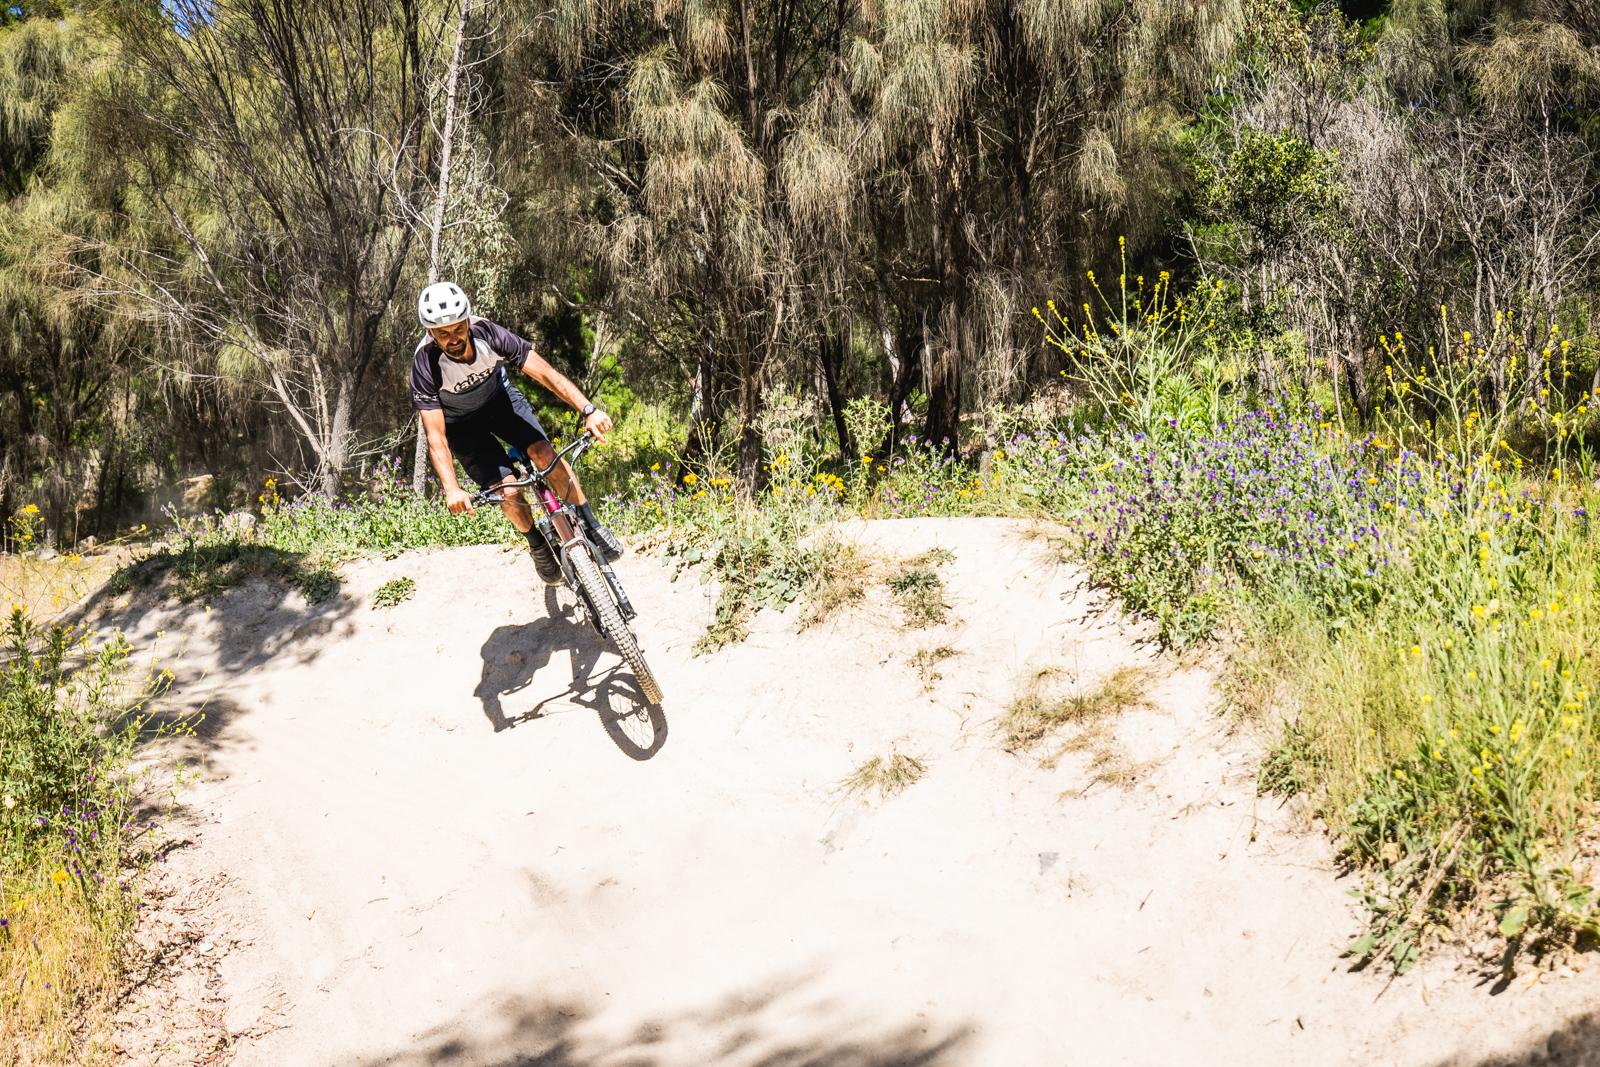
What’s a hip jump? Well, it’s effectively any jump where the landing is at a different angle to the take-off rather than straight on. On the extreme end hip jumps can be at an angle of ninety degrees and even beyond, but most commonly they will be at less of an angle than that. While hip jumps can be intimidating at first, once conquered they are great fun and a great skill which can transition to clearing sections of tricky trail and popping from one trail feature to another.
It’s important to remember that you’ll have a preferred or natural way to turn when taking on a hip jump. It’s a great idea is to practice both ways as the opposite way to natural can feel really strange at first and learning both ways from the get go will make the learning curve much easier for the opposite side later on. You definitely want to have some confidence jumping before you start attempting to turn in the air so make sure you have your basic jumping skills dialled and are confident before taking on the hips. And as always, remember that progression is key – start small and with less angle and work your way up. Spine style hips like this one at Stromlo are a great way to learn as you can progress higher in the air and further along the landing as your confidence builds. Here are some tips to get rolling.

Step 1 – It’s all in the hips
You need to use your hips to hip jump! Well, first you need to use your head. As you hit the lip, like with any jump, spot your landing as early as possible but the key for a hip jump is to lead with your head, then your hips and then your legs.

Step 2 – Square your body up with the landing angle
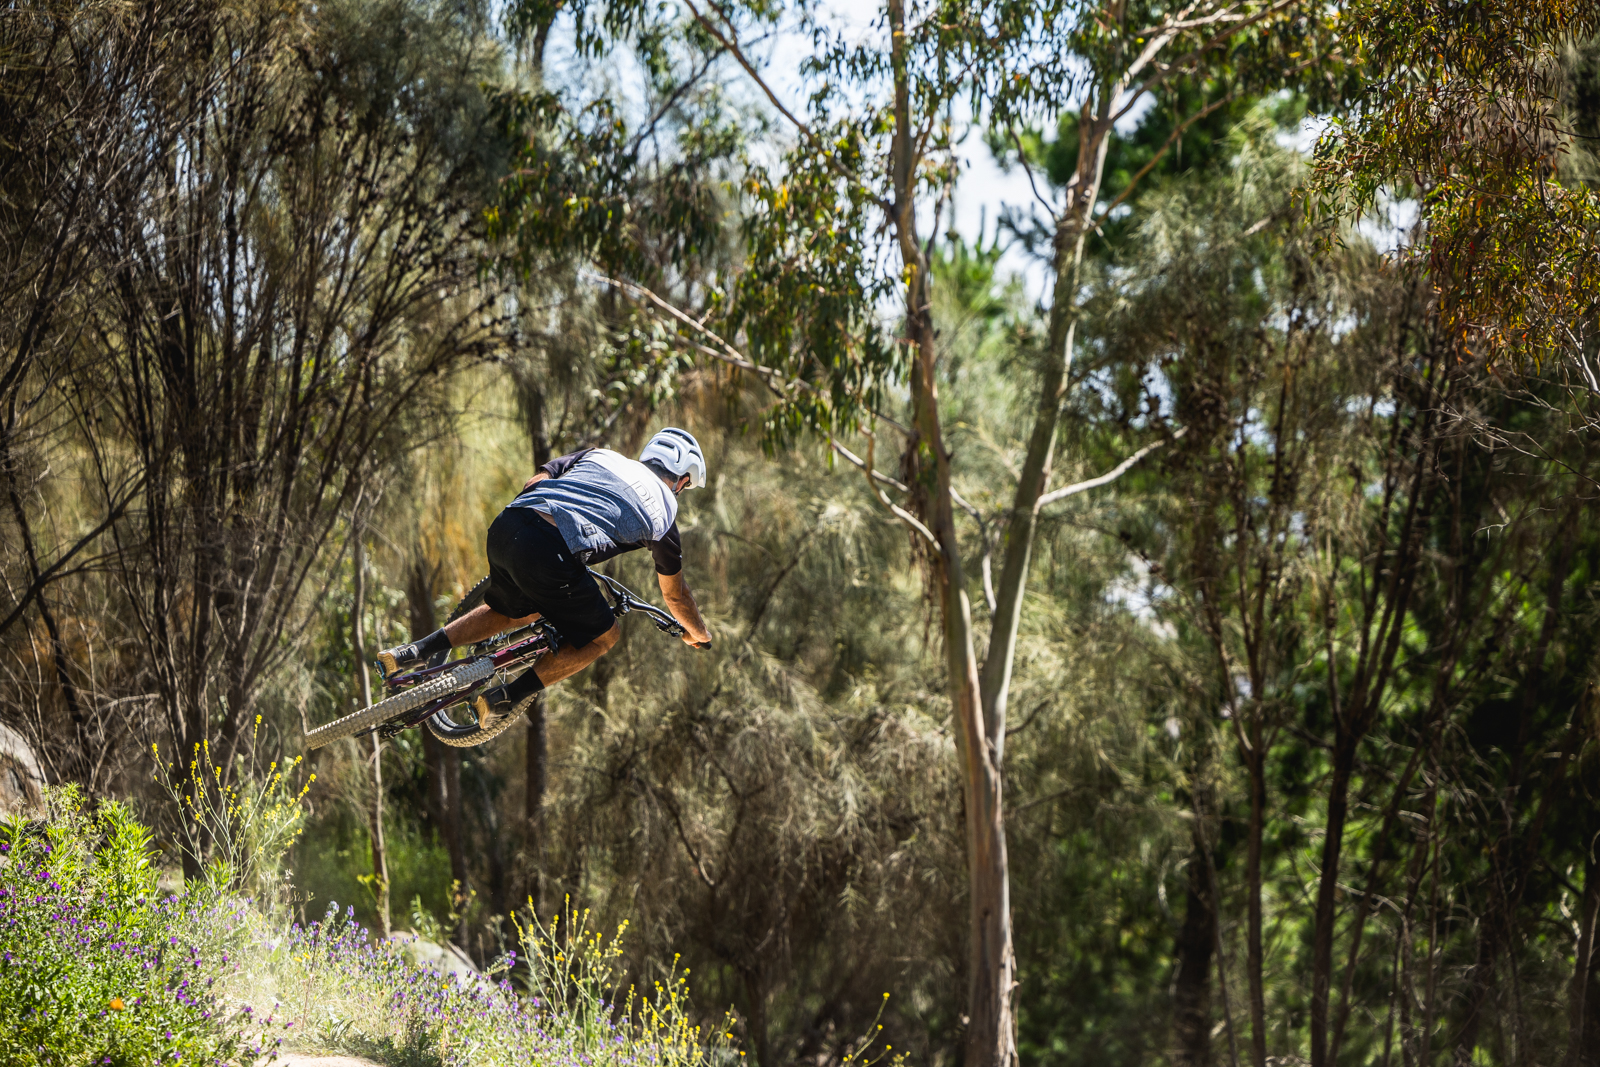
As you take off, look to square your head, torso and hips up with the landing. You can turn your bars as well but your body position is key as this is the position your bike will follow. If you turn your bars and leave your body straight your bike will go straight. So remember; it’s all in the hips.
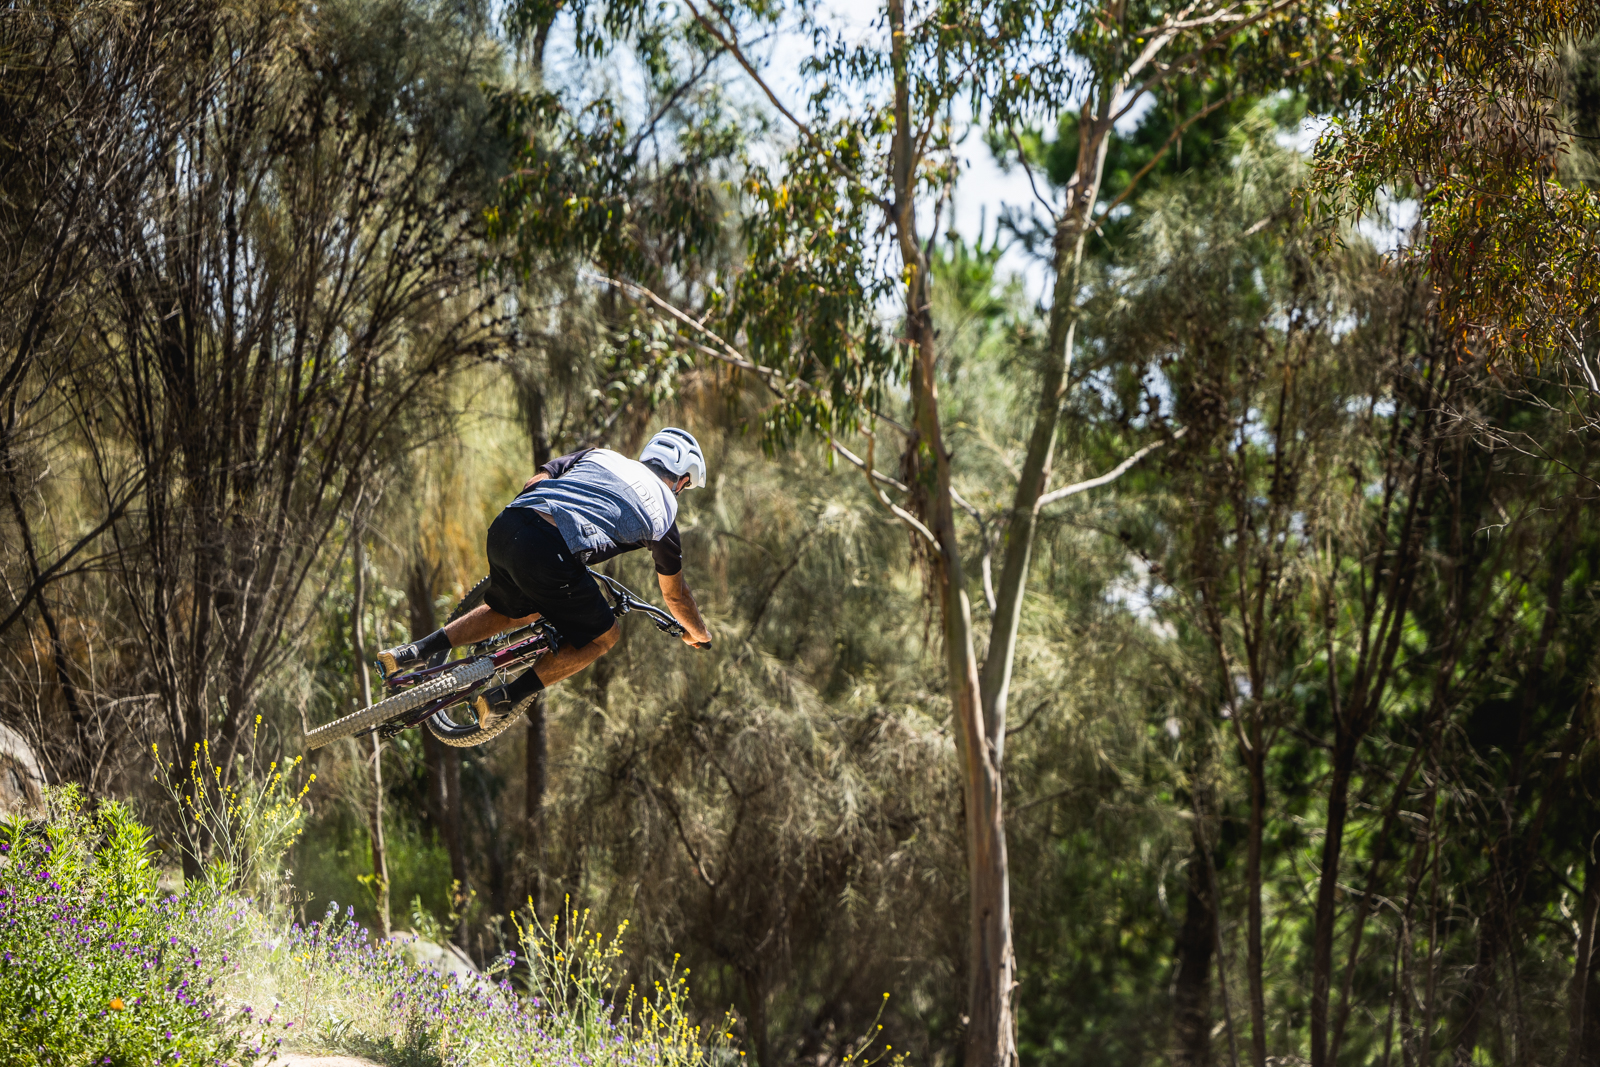
Step 3 – Follow with your legs
Once you are up in the air and facing the landing, you want to use your legs to push the tail end of the bike out rather than turn the bars to begin to bring the bike around. Think about the whole process as one big turn from the take off to landing. Your bike will naturally flatten out a bit in the air as you do this and as you get a bit more confident you can begin to flatten it out even further as it actually makes it a bit easier as you progress to larger jumps.
Step 4 – Get everything straight for the landing
As you begin to come down, aim to have everything squared up as you land. You can see throughout the process I’m constantly focusing on the landing angle and looking to bring my body and bike to this angle to land with everything in a nice and straight line. Also bring the bike back to a vertical plane by gently pushing down with the outside hand and pulling up with your inside hand on the bars and dip the nose for landing as you want to land at the very least, the same angle of the landing.

Step 5 – Land like you would on a normal jump but with a bit of a lean
Landing is a fairly straight forward affair assuming you get everything straight. You’ll find you will naturally land with a bit of a lean on the bike as you touch down as the whole motion from beginning to end is really like one big turn like I mentioned before. For hip jumps you want to land with two wheels touching down at the same time and on the steeper landings even a little nose heavy as this will help with the turning motion of the bike.
