Everything you need to know about The Pioneer
Signed up for The Pioneer and a little bit worried about what to take, how to prepare and what's ahead? Our Ed gives his insights after completing the first two editions.
Photos: Tim Bardsley-Smith
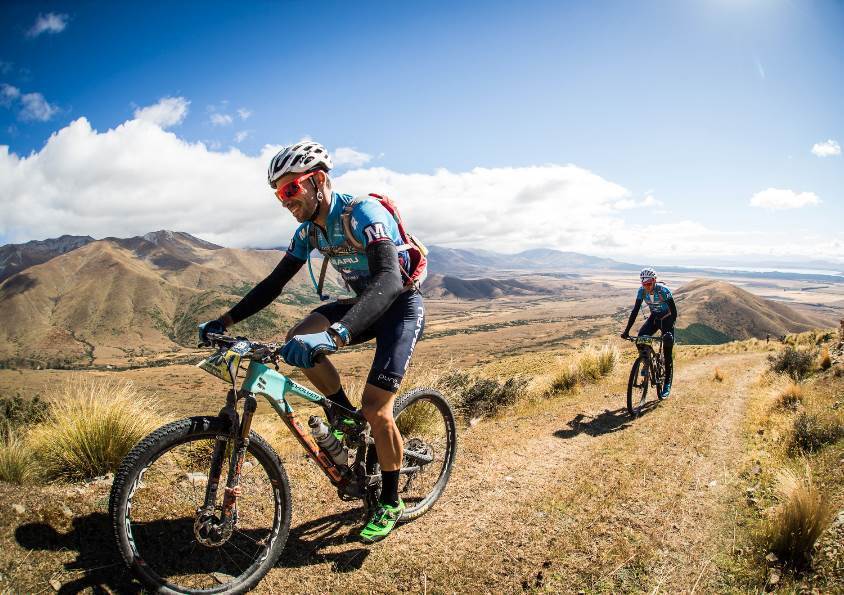
The Pioneer hit the global stage race scene in 2016, wowing the first riders who chose to take on this 7 day journey along the Southern Alps of New Zealand. The views were immense, the riding was tough but the reward for finishing each stage to the relative comforts of camp to share stories and revel in what you achieved made it all worthwhile. Plus, it was a week riding your mountain bike in New Zealand, from bike park trails to raw backcountry trails and everything inbetween. It was better than a week at work.
After the 2017 edition, the organisers of The Pioneer looked to change the route for the event. Thje point to point nature of the Christchurch to Queenstown route had to prioritise making the distance, and therefore bypassed some quality trails that the routes could take in. It was hard on bodies, bikes, and the event crew.
With a new date for 2018 scheduled – a new course plan was laid out. The race would start and finish in Queestown, ther race would now cover 6 days, and while there were about 120km less to cover – climbing stayed around the same. The big difference was the trails that would be within the route, including Ride Rock, Flat Top HIll, and numerous trails we've ridden on in Central Otago.
You can now find the full course details for the 2018 edition of The Pioneer on the event website.
The course for The Pioneer in 2018
In a nutshell – it's hilly. With 424km to cover in 6 days, you will climb 15124m. No this isn't based on an inaccurate GPS upload, the routes have been tested and proofed by the event team. They just have big hills in New Zealand.
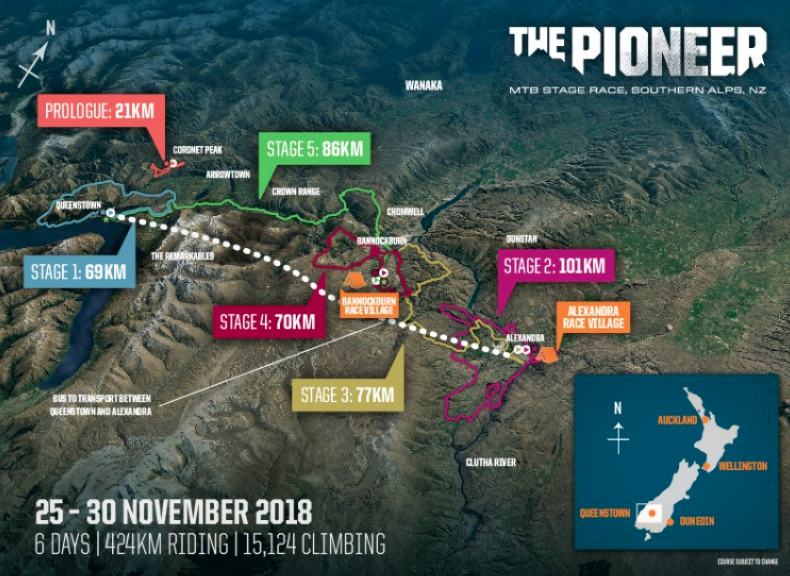
For the full details of the course you're still best to go to the event website. But here's a little bit of what to expect based on the trails, and the ebb and flow of stage racing.
Prologue: Coronet Peak
It's short at 21km when compared to the other stages, but with 1148m it has a lot of climbing – and that's a similar distance to what you might cover in a local XC race, just with more climbing. Coronet Peak is high at 1200m, and weather could be freezing or boiling, and just about anything inbetween. A small climb should settle your nerves before a long descent, including Rude Rock. Download the profile so you know what's coming.
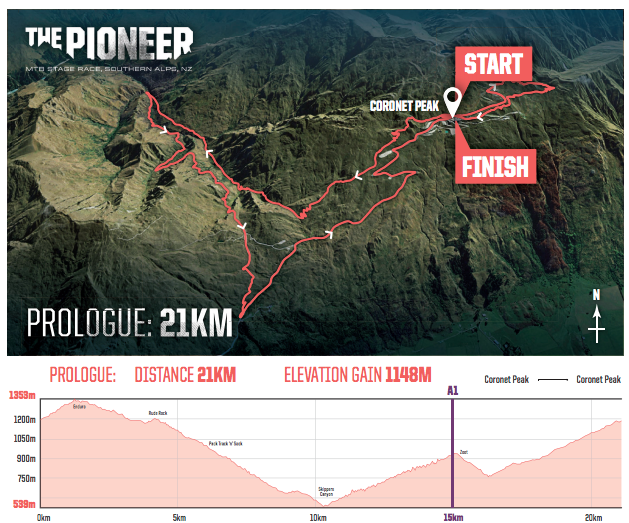
This is a trail used for hard and fast gravity runs, and everything has a rollable line. If you're on an XC bike it would be silly to get caught up in the pressure to go as fast as possible today. Be smooth, be efficient – and be prepared for the next 5 stages which could have 30 hours on the bike. Don't end your race in the first 1.5hrs by trying to save 10 seconds. If you really want to nudge the overall ranks, pace yourself on the final climb so you finish strong, and not broken.
One of the key things to remember on this stage is watch your time. You'll have a set start time. Don't miss it. Don't faff around after the race, get back to your hotel and get cleaned up and sorted for the first big day tomorrow.
Stage One: Queenstown to Queenstown
This is one big loop which will likely start with a bang, heading onto the Queenstown Trail once out of town. This is gravel shared use path, so expect skatey lines at speed, and small climbs that don't really show up on the profile actually making quite an impact on your legs, and trimming the top 100 riders into 3 or 4 groups.
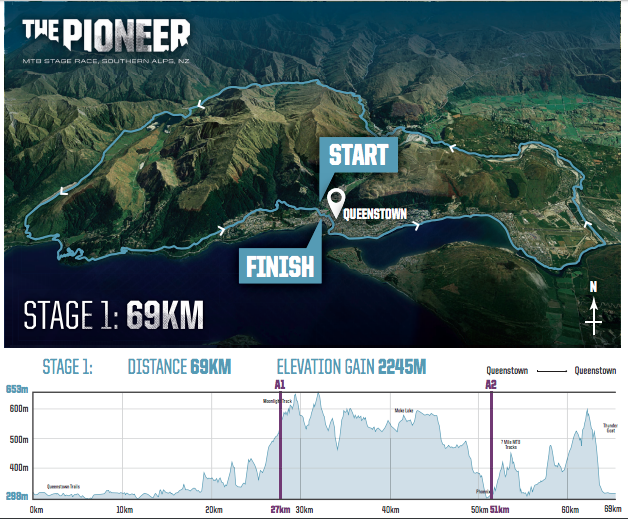
It's worth staying fresh for the main climb, which starts on singletrack and ends on farm trails and 4WD trails. Up top you're on a mix of mountain bike trails, Department of Conservation boardwalk and trails, farm trails – and just about everything. It's never truly flat and there are plenty of climbs before the end.
This day will really let you know where you stand. 2245m in 69km is steep and hilly, and with a mix of demanding trails and nervousness with the first mass start it will be easy to overcook it early. Don't stress on the vertical and strip back to minimal spares or race food – the high load of climbing will have you burning fuel – keep something in the tank for the final climbs and print out a profile so nothing comes as a surprise.
Stage 2: Alexandra to Alexandra
After the bus transfer at the end of Stage 1, your legs probably feel awesome… or not. Rest assured most people will feel the same after two days of racing. With 101km and 2664m on the agenda for this stage it will be a long day in the saddle, but relatively flatter than the previous days. Flatter, not flat. Download the profile here.
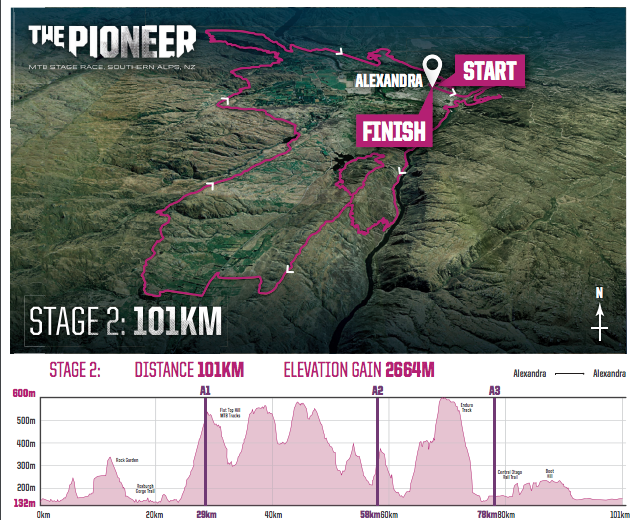
This day combines part of the Otago Central rail trail, classic Alex trails, the Clutha Gold and Roxburgh Gorge trails – there shold be plenty of variety. When you're on the singletrack, you'll find there's a fair bit of loose rock, and roll overs you might not be able to completely see over. Scan for small rock cairns, tape markings or even some paint to guide you as to where the best line is.
Alex is a cool town, don't miss rolling into town after the stage for a coffee and cake. Or beer and pie – whatever suits.
You'll really have a mix of singletrack and prepared tourist bike path today. Work with your team mate on when to open it up, and when to just let it flow and ride with low stress.
Stage 3: Alexandra to Bannockburn
A true point to point day! Get up early to pack your things, you're finishing somewhere else tonight. With a slight climb towards the tail end of the opening 25km, there might be a moderate start further down the field, but expect a fast and very hard start at the front of the race as some teams will have a point to prove. Download the profile here.
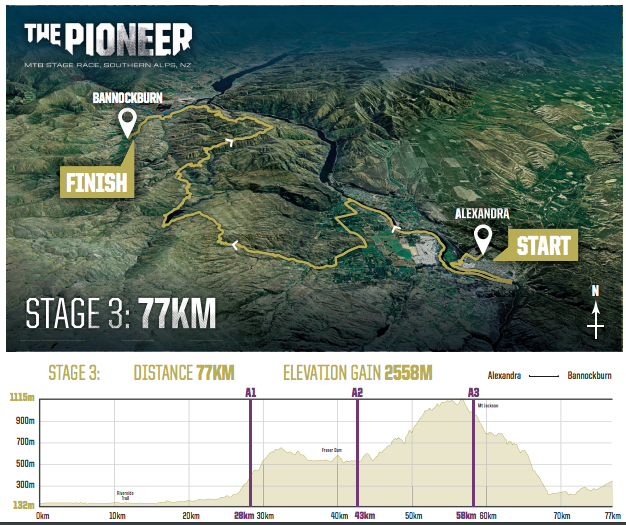
Climb towards a dam on good quality dirt roads, then loop around (and through) the lake to a 15km climb up the range. You'll be on barely used double track so pick your line and watch a long way ahead for erosion gullies and big alpine rocks ready to tear your tyres apart. A long descent follows, with a steady climb to town.
Don't let fatigue get the better of you today, and it's worth doing a bit of a warm up to be ready for what will no soubt be a fast start.
Stage 4: Bannockburn to Bannockburn
The Queen Stage, and it's a little cruel that it calls on day 5 of racing. This 70km loop covers 3563m of climbing. That's more than Port to Port or Cape to Cape have in their whole 4 days, just to put it into perspective. Grab the course profile and cry.
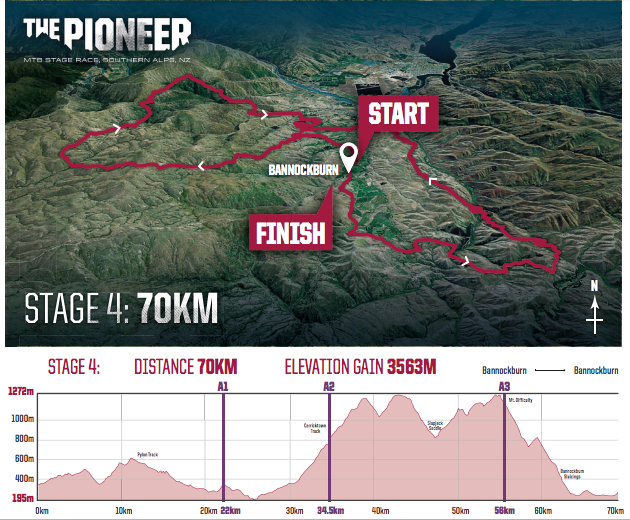
With a couple of mild climbs and descents (withint the scale of the day) to start, the serious business starts at about 25km. The Nevis Range starts with climbing Mt Difficulty, it is a big climb and starts on super steep switchbacks. There's another descent and climb on top, and these trails will be littered with alpine rock with sharp edges.
The descent is fast and leads into some aquaduct trails to finish an epic day.
Stage 5: Bannockburn to Queenstown
The finish! You've made it! But there is still a sting in the tail – this is no parade lap for those who have conquered The Pioneer. 86km has aclose to 3000m of climbing, The Pioneer keeps you working until the finish – grab the profile.
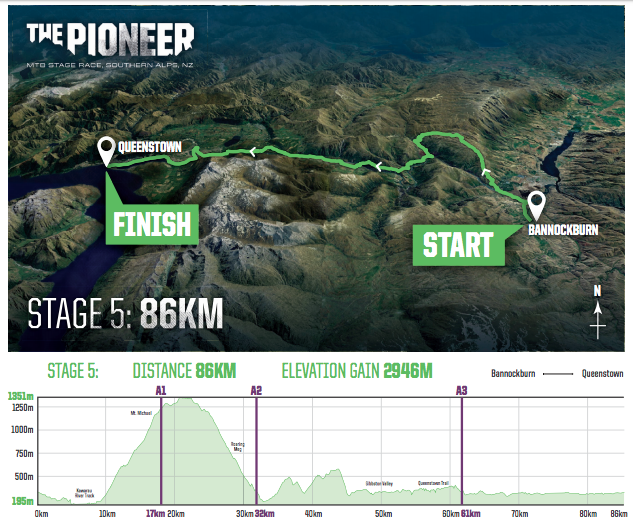
After a fast road start, you'll hook onto a trail and face Mt Michael – a 1100m climb on totally rideable surface. Just be warned it's a false summit, the high point lies after the top of Mt Michael.
The trail descends towards the Roaring Meg trail, similar to the finish of The Pioneer in 2016 and 2017. A descent takes you to a jetboat crossing and the final stretch to Queenstown. It feels drawn out on tired legs but don't keep pushing – you're almost there.
The final push takes you to the heart of Queenstown, right back where you started on Stage 1.
So that's the course – but how do you train for The Pioneer?
How to train for The Pioneer
With the terrain, distances and amount of climbing listed – clearly this isn't something you should attempt 'off the couch'. Being fit for The Pioneer can fall into a number of categories, from surviving, to meeting a goal, or even being in contention in your category.
This isn't the place to give a complete training schedule – you'd be better contacting a coach about that. A coach can help with a personalised training program that matches your current and goal fitness, your schedule and your physiology. But here's a few things to focus on.
Spend time on your mountain bike
It sounds obvious doesn't it? But training for The Pioneer is less about doing hours, as about doing the right hours. You're likely to have a race time of 30 hours for The Pioneer. That doesn't mean you need to be doing 30 hour training weeks – but you need to make sure your body is ready for the demands of The Pioneer.
A road bike is great for banking long hours on the weekend, but it does nothing to simulate long hours on a mountain bike. Your mountain bike, and mountain biking, involves a different position, more position changes, and a lot more of a workout for your upper body and core. Make sure your weekends have some long MTB rides, with varied pace. Long and slow kilometres will be excellent at making you ride long distances slowly. If you need to do base training then don't miss these tips from Jenni King.
Use your weekends
If you're reading this, you probably don't get paid to ride bikes, so preparing for a 6-day mountain bike race might seem daunting. But a lot can be done if you're training smartly. Depending what your constraints are, use your weekends for your long rides – and do two back to back.
You might have a harder Saturday and a longer Sunday – especially if there's a local event on Saturday to tie in. Jenni King provided great insights into how to prepare for a stage race – check them out.
Getting the workload in on the weekend means your Monday rest day can let you hit the working week on time without battling to get out on the bike first thing, and ideally be fresh for shorter and more intense sessions mid-week, which should be easier to fit in around work.
Train with your team mate
The Pioneer, like most international mountain bike stage races, is raced with a team mate. if possible, train with them too. This is not so much about being exactly the same speed, but it's more about approaching trails, and the race, in the same way.
Work out where each of your strengths lie, and understand what you can do to work with, not against, your team mate. You aren't racing each other, waiting for one of you to blow up. You are racing together, using your strengths to bolster the other's weaknesses or vice versa.
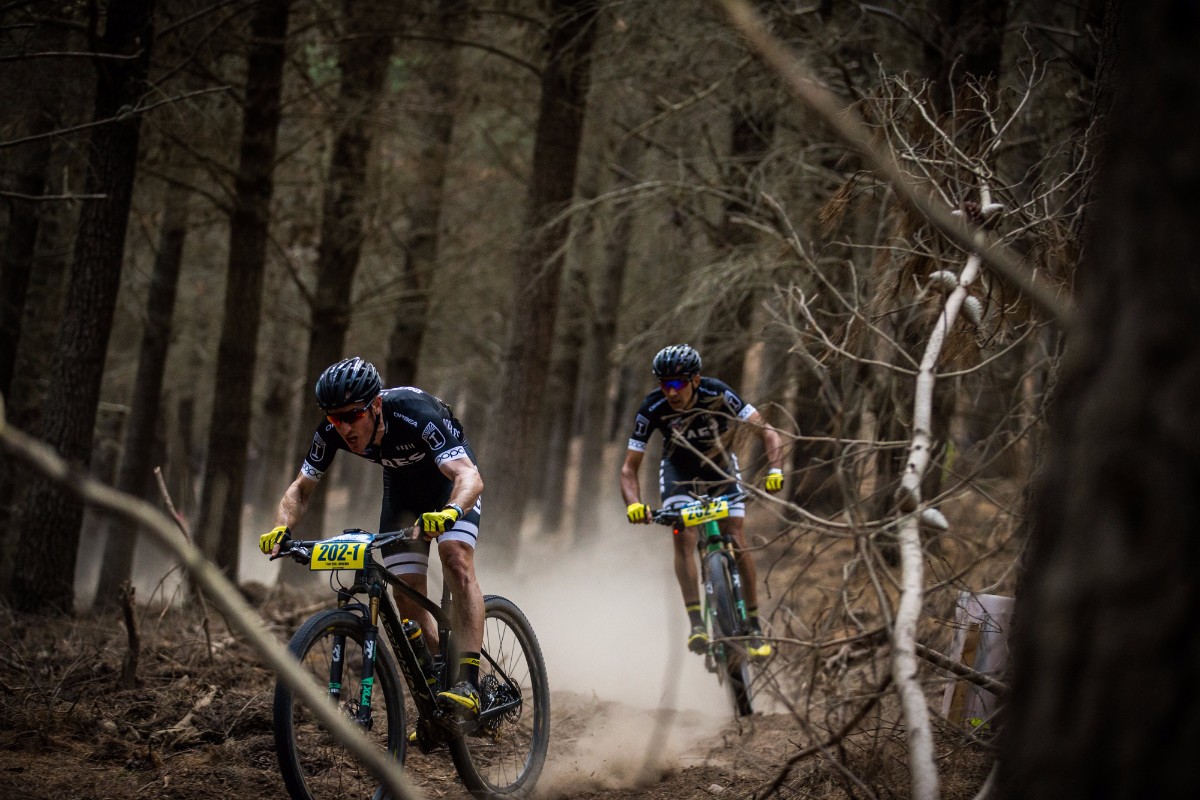
This is as much about pedalling as understanding how you click. Who fades quietly, who moans when things get hard, who comes prepared and who might forget essential items. Use these rides together to see how you both act under pressure – and how you can help each other through. Your best tool for this isn't a higher FTP or better skills on flow trails. It's empathy, patience and communication.
Race your mountain bike
It sounds obvious, but don't hold The Pioneer as such a lofty goal that you have a program that doesn't involve racing beforehand. With dates in late November, no matter where you are in Australia there will be events from mid winter onwards to test yourself – and even your partnership.
In the west, races like the Dwellingup 100 in August, Southern Peaks MTB, or Cape to Cape would be a great race prep. None are a pairs race but that's not to say you can't race it like one in a men's or women's category.
The Redback in Alice Springs would be a fun way to get four days of racing in – all of it shorter than The Pioneer, but still a good opportunity to get to a dry climate from wetter southern states.

Reef to Reef might be the best option for you and your team mate, as it has a pairs category with 4 days of racing. There's a time trial in there which is ideal prologue prep, plus days on dry and gravelly terrain at Davies Creek, more rugged trails through Twin Bridges, and of course a fast descent on the Bump Track. If you could only pick one event to do as preparation with your team mate – this would be the pick.
There are a whole lot of other events on the east coast though, like the Flight Centre Epic marathon in early September, or the Hellfire Cup in early November down in Tasmania. You can race that pairs, so if you can manage the time off in the same month as The Pioneer – this is a good one.
If you're after more training tips – don't miss the Fitness section on our website.
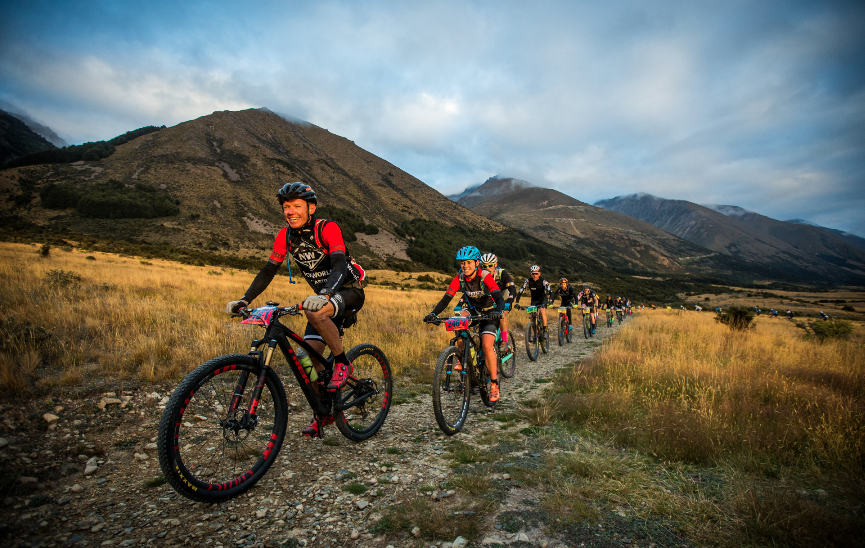
What bike do I need for The Pioneer?
Good question! Six days of mountain biking is pretty demanding on any bike, but given the amount of climbing and descending, and the rock, dust, water and grit – an event like The Pioneer places quite high demands on your bike. Here are some guidelines based on racing the past two years, and doing many other similar races.
Hardtail or full-suspension?
I won't be taking my hardtail. There is a lot to like about a hardtail for events with lots of climbing, and on multiple days. Less weight, less maintance, easy options for carrying two bottles… and if The Pioneer was in Europe where the 4WD trails would be far smoother from such a greater population and more use – a hardtail would be king. But it's not. It's in the South Island of New Zealand where the population density is tiny, and it uses a mix of bikepark trails, backcountry routes and just about anything. A short travel, or 100-120mm full-suspension bike would be best. Aim for a cross-country style bike like the Specialized Epic, Norco Revolver, Giant Anthem, Momsen Vipa Race or Cannondale Scalpel – bonus points of it can carry two water bottles. The new Canyon Lux would be an excellent choice.
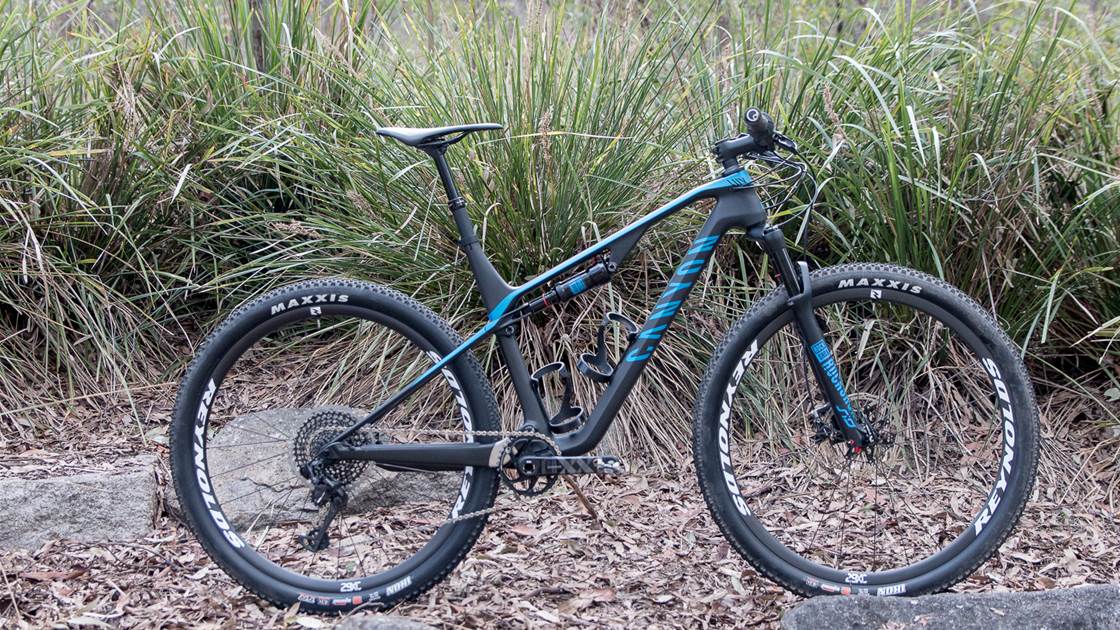
But, if you don't mind a little more weight uphill then a Norco Optic or other 120mm fast trail bikes would do really well. Just optimise your position on the bike for comfort and efficiency for 4-6 hours on the bike each day.
Go wide on the drivetrain
The drivetrain wars are on but really it doesn't matter what you ride, just make sure you have a wide range. That might be 2×10, or 2×11, 1×11 or 1×12. Whatever your choice make sure you have a few key spares for your drivetrain. It will cop a hiding through the week, so understand what chainlube works best for long days in mixed conditions, and take a little bottle with you each stage.

You might be best to drop one chainring size for the race, depending on what you ride at home. I mostly ride on XTR 11-speed with a 34t chainring and 11-46 XT cassette. But I'll drop to a 32t chainring for The Pioneer (as I did in 2017) and maybe put the 34t in the bag incase I feel crazy strong and want to change it. I'll most likely do the same with a 30t chainring.
There is a need to go fast on the flats but more has to do with climbing. A super low gear might not always be the answer – it can just leave you going really slow. See what local climbs might match the gradients of climbs at The Pioneer, and think about what gear you can push on the gradient for an hour.
What about wheels?
At AMB we are believers that wide is right, and that is especially the case for XC and trail wheels. Leave anything delicate and too boutique at home – unless you take spares. Your bike and equipment choice for events like The Pioneer are about reducing risk.
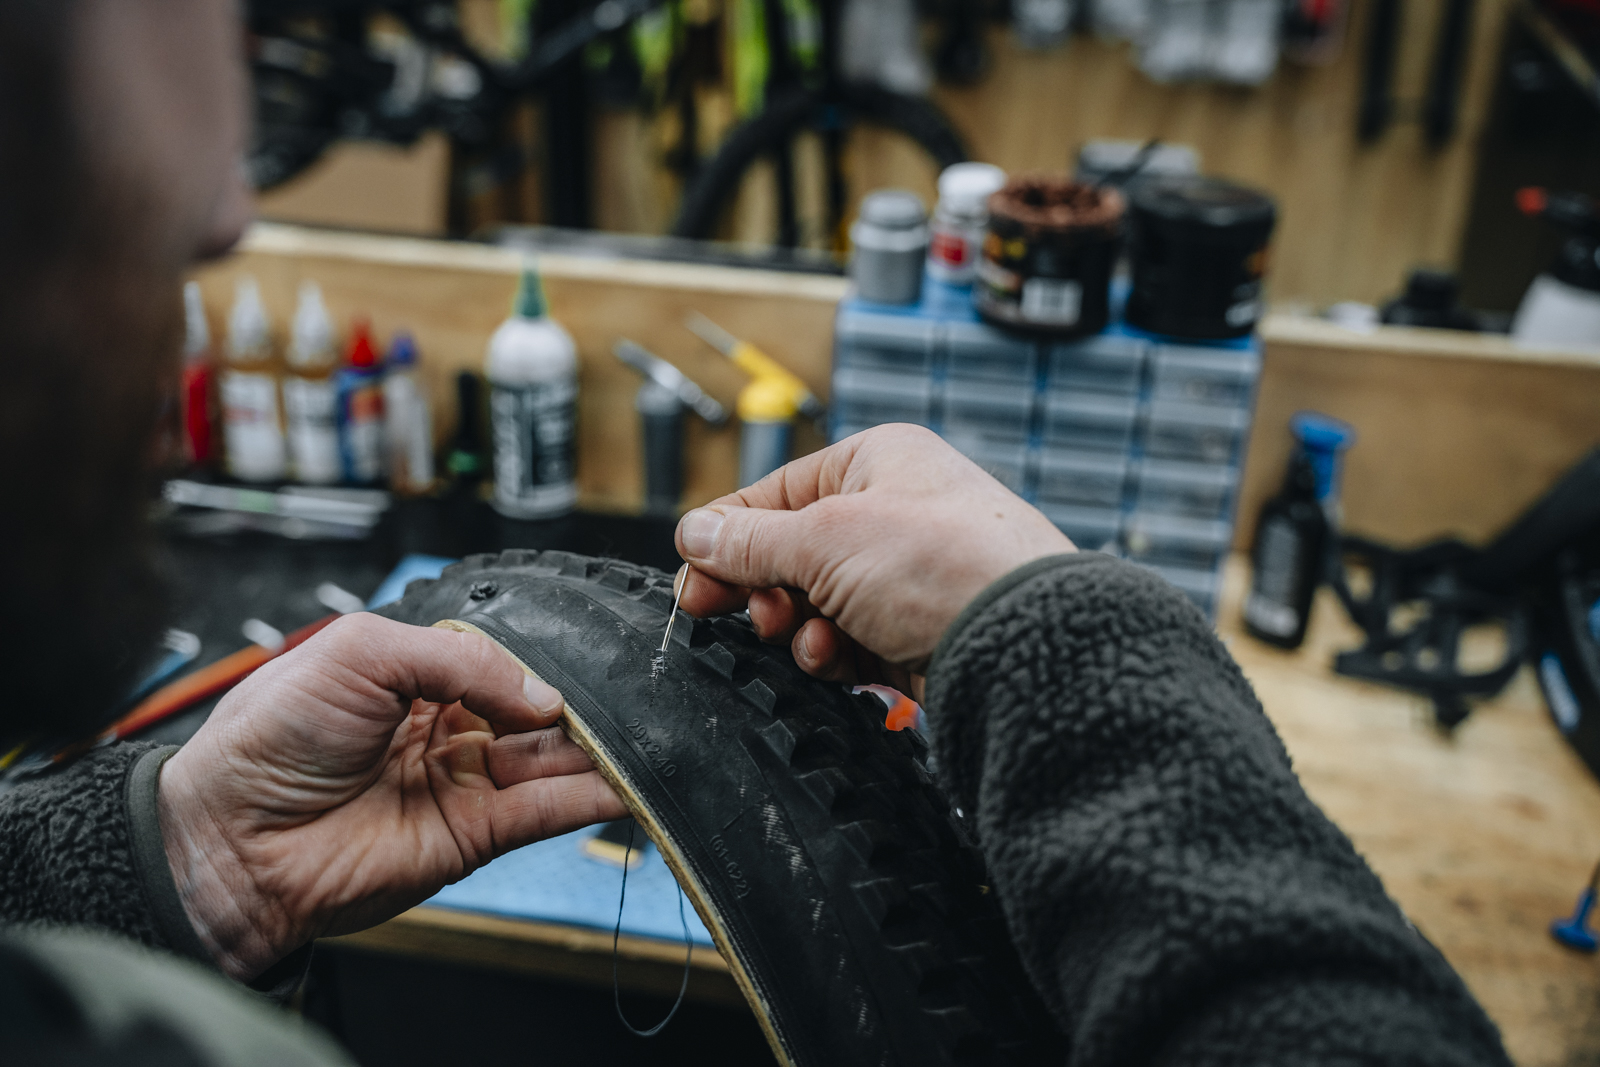
To speak only in parts spec, I'd suggest something at 22-26mm internal rim width, ideally less than 420g per rim, 28 spokes or more, and with sealed cartridge bearings – that are new. Pack spare spokes for each size you need, and make sure your rim tape is new and your tubeless valve isn't gunked up.
This might be something like a NoTubes Crest wheel set, or a Shimano XT wheel set (sure, cup and cone bearings but Shimano know how to do it) or even something like a custom built DT Swiss wheel set.

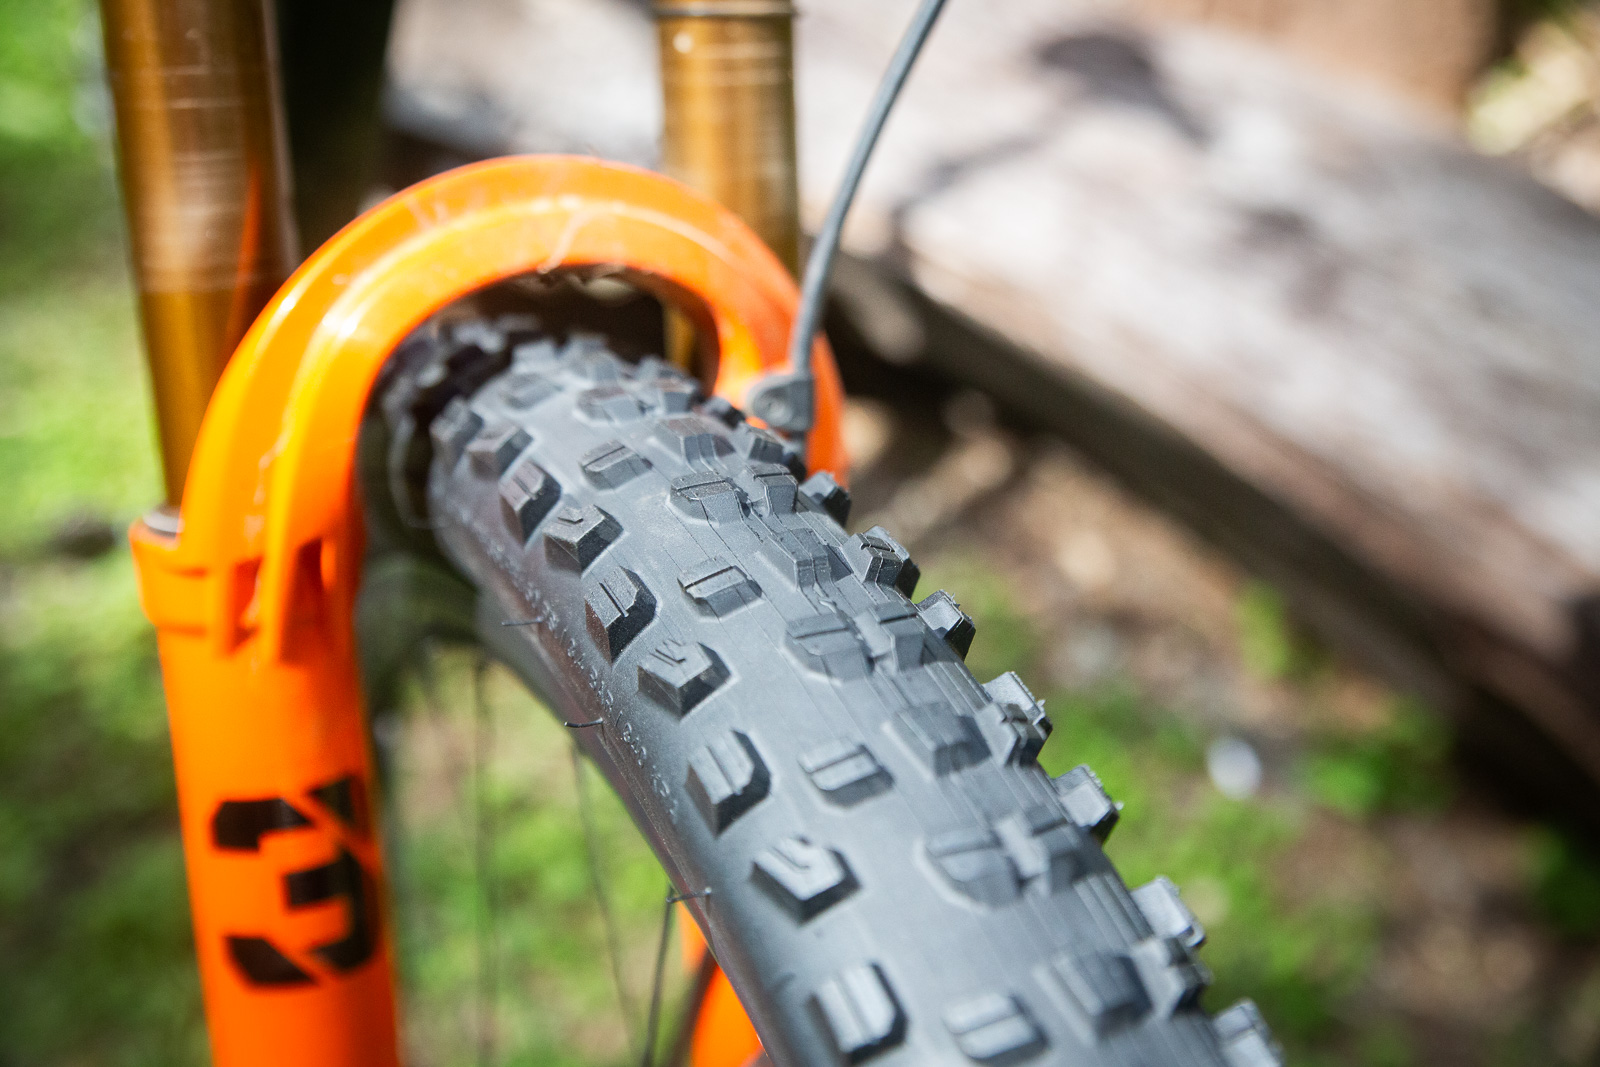
For tyres, you need to walk the line between rolling effciency and grip. There's a good argument for running something faster out the back and grippier up the front, but don't neglect the need for climbing traction. AIm for 2.2-2.35" inches, as long as you have the frame clearance for if things get mucky. Run a tyre with strong sidewalls, and use plenty of sealant.
And tubeless – just do it. Check out these tips for foolproof tubeless set up.
Do I need a dropper post?
No. But I won't be taking mine off. It is ironic to talk about need vs. want within an article that is about going on a mountain bike holiday… but a dropper post will help with positioning on descents, keeping your weight balanced to have the best combination of front wheel traction and a low centre of gravity.
Long descents with a dropper post can leave you in a lower position than you're used to if you don't normally use one, and your legs will notice that. But with the right technique, you should be able to work the bike and trail features more for easier speed, a smoother ride, and more fun – gving you more energy for the next climb.
What about spares and mandatory gear?
Completing a stage race is about finishing every day. You are riding in a team of two and there is a mandatory kit list you have to have each stage. This includes a helmet, warm hat (or beanie), windproof jacket (not vest), two spare tubes, pump, multitool, tyre levers, patch kit and chain tool, plus a first aid kit with bandages, space blanket, panadol, electrolytes, whistle, gauze, tape… lay it all out and it's quite a bit.
Now add in things like a derailleur hanger, quick link, some small zip ties, some gaffa tape, a couple of spare bolts and a tiny chain lube, and you've got some gear to take. Then add race food.
If weather looks risky you'll also need to add a spare base torso layer, warm tights, warm gloves, and a hooded waterproof jacket – so with sealed seams.
This is a lot of gear, and it is worth having a good hard think about how you will carry it on your bike, and where.
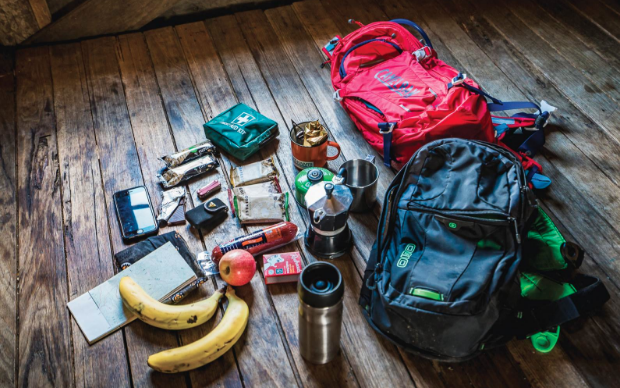
Most importantly, check for compatibility and effectiveness. Does the multitool you have contain all the tools you need? Like for the small bolts to replace your deraileur hanger? Does the chain tool have enough leverage? WTF is the chain tool for anyway? Can you take out your tubeless valve if you get a flat, or is it seized in place? Does your tiny pump actually do anything?
Carry some more spares in your luggage too, like a tyre, chain, jockey wheels, sealant (in a plastic bag), spokes for your wheels, a rotor, grips, rear derailleur if you have one, and brake pads. The mechanics are top notch but if you have the spares it's more straight forward. Better yet, have the skills to be able to perform a good clean and service on your bike each day. There are all sorts of places to brush up on your workshop skills – check our tips for some basics. But maybe you should book in to see people like BMTI for a full rundown of basic mechanical work?
So do I need a backpack?
Yes you probably will. If you have a bike that can carry two bottles, and you have a good system for attaching other spares to your bike and carrying them in your pockets – you might not. But if you have to carry the emergency equipment then you'd be crazy to not have one.
I used a backpack for most stages in both 2016 and 2017, opting to go without on the final stage each year. As it's a stage race, you need to think about the following stages – and getting stuck without enough food, water or spares early on in the race as you didn't want to carry them is a bit… well it's a bit stupid.

There are a number of light weight, mid-volume hydration bags on the market. You might even elect to not have the reservoir and just use them for storage. I used a Camelbak Octane XCT in 2017, and will use a Camelbak Chase Bike Vest this year – or the Octane 10 if there is bad weather. As I'll be racing mixed I p[lan to carry the majority of spares and equipment for my team mate.
What should I do when I'm not racing?
This one is easy – relax, as you're on holiday.
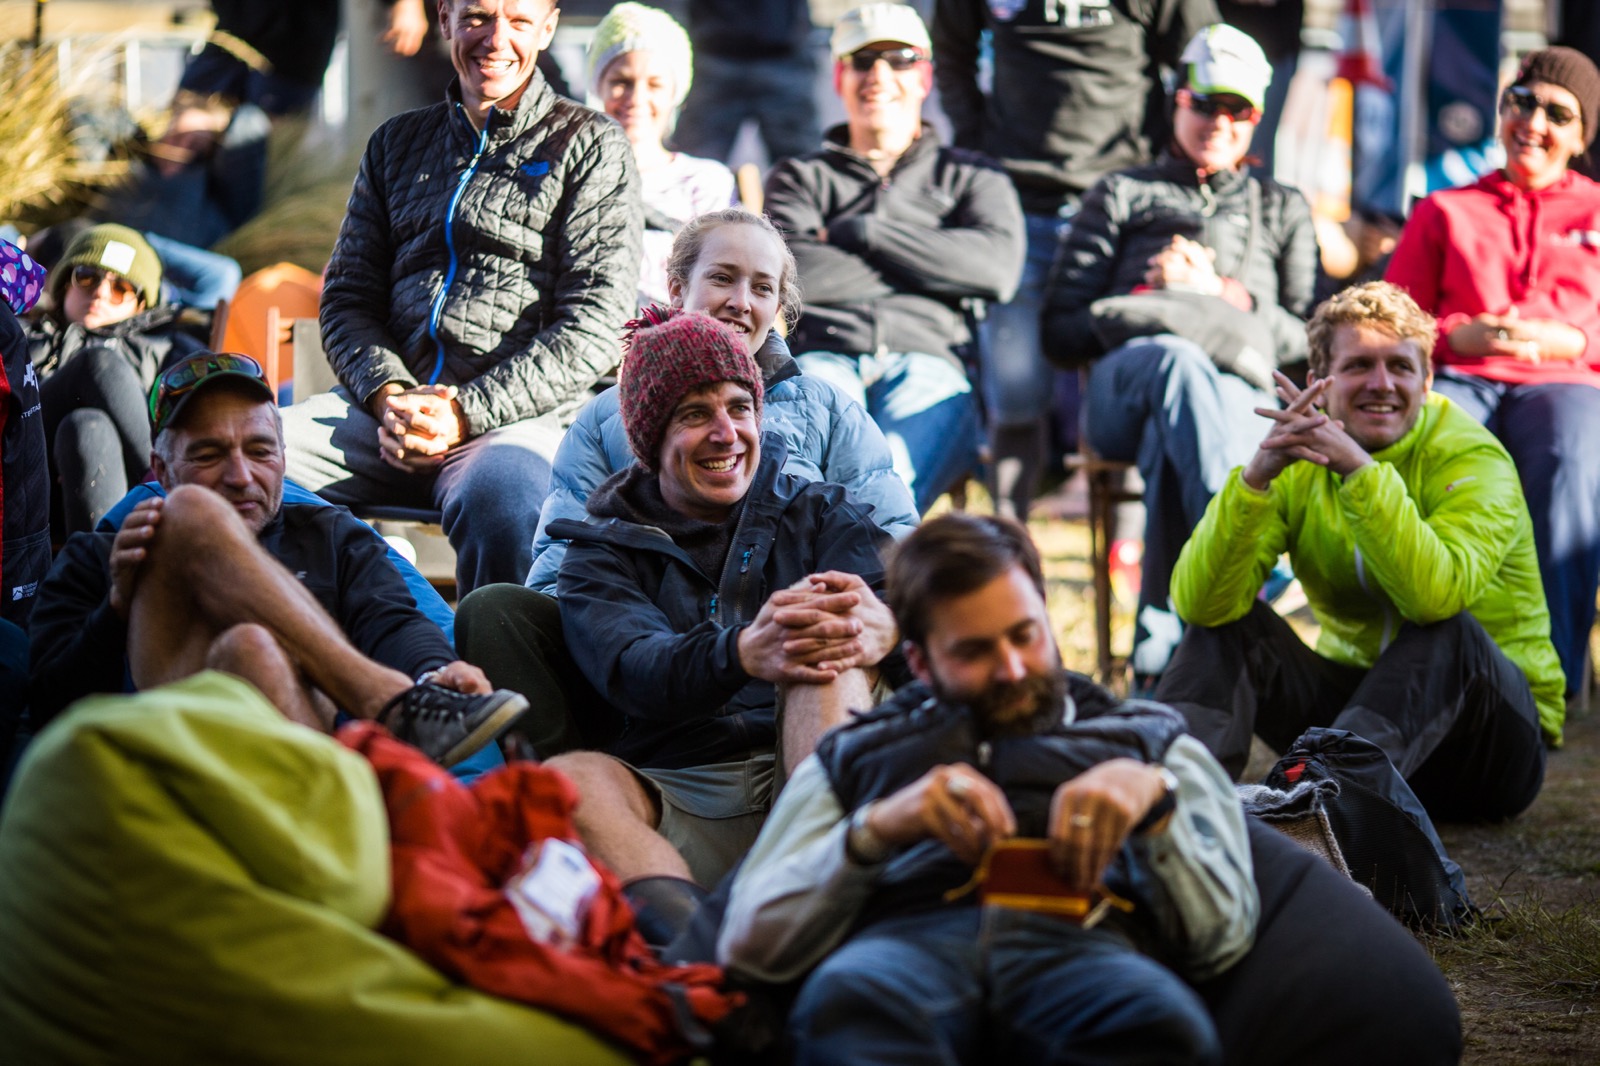
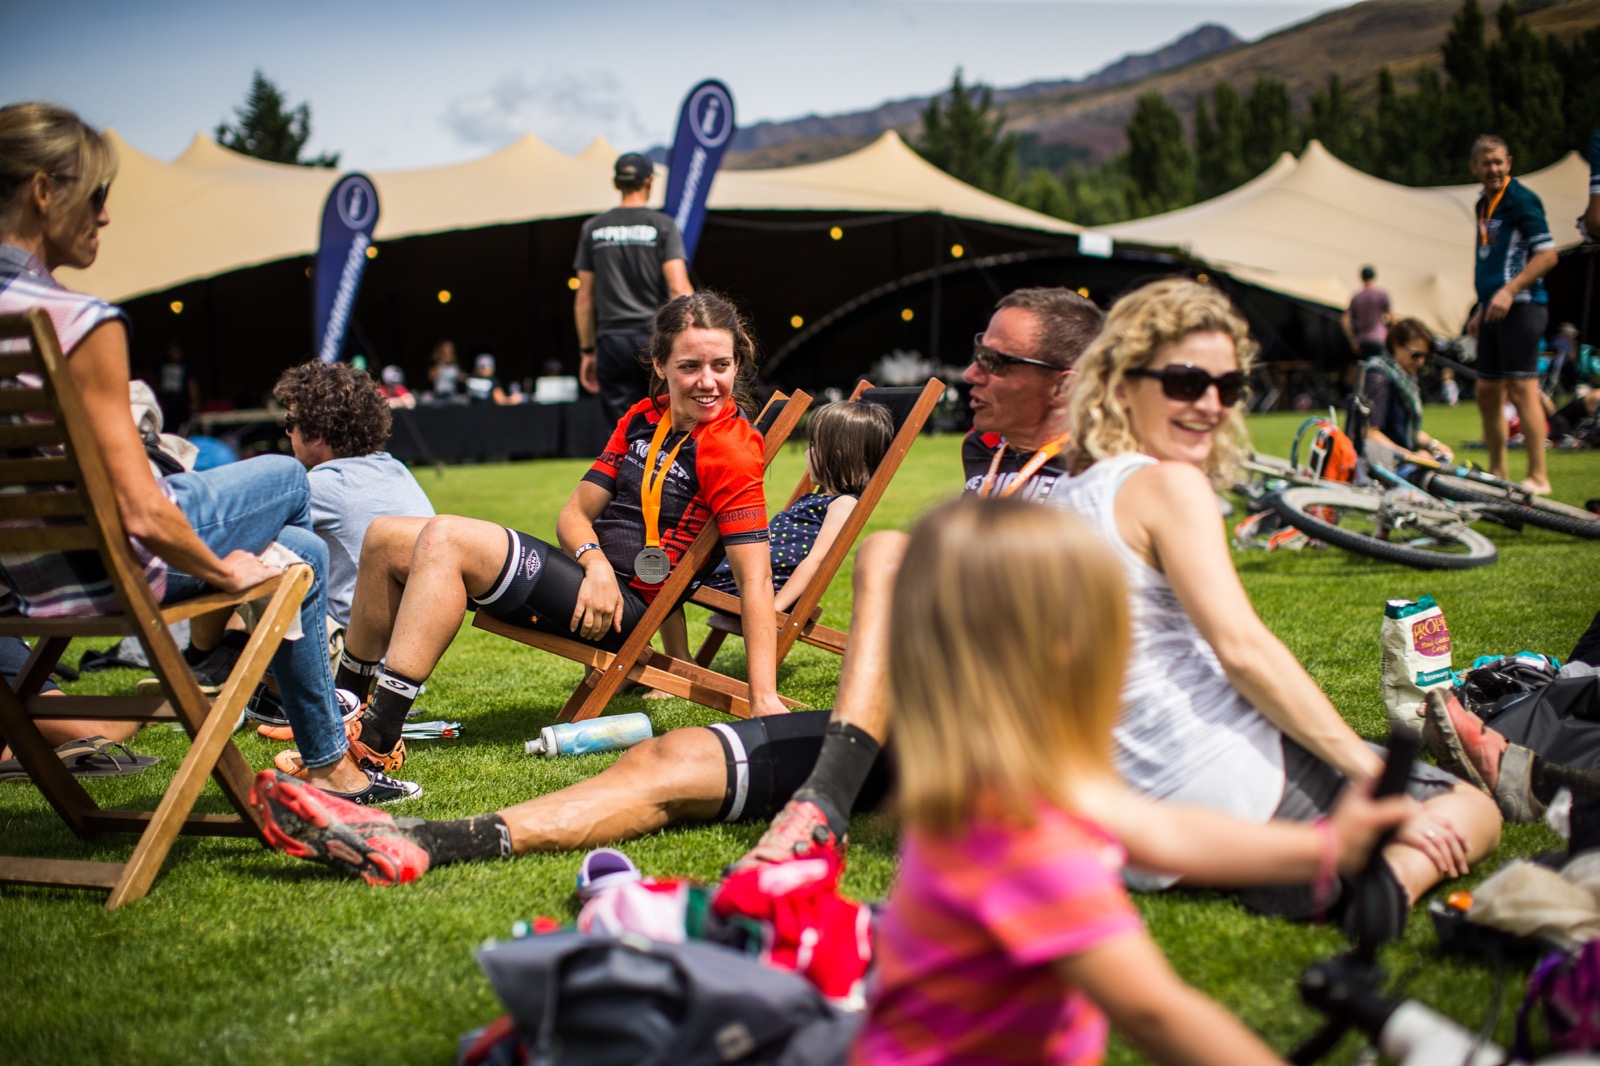
But to make the next day go smoothly, there's a few things you should attend to. The Pioneer has a top-notch chill out area, where you can order drinks at the bar, lounge in bean bags, flay frisbee (if you have the energy) and regale friends old and new with how you saved yourself from going head first into a gorge on that sketchy corner.
The rider camp has bike washing facilities, and hot showers. First thing once you're finished get some food and water in, chat with your team mate and make sure you're still mates.
What you do next is up to you, but you need to find your bag and tent, shower, clean your bike, and eat more food and drink more water. The order is up to you.
I tend to clean my bike while dirty, find my tent and bag, leave my bike there, have a shower, eat a pizza, then go wipe down and inspect my bike and prep it for the next day. This might include check bolts, bearings, tyre sidewalls, spoke tension and tyre and shock pressure. I've lost 20psi out of a rear shock in a stage as it had to work pretty hard – so it pays to check these things.
There is massage available, mostly via prebooking. There is a laundry service or handwash your kit in the shower if there's enough sun to dry it.
Then it's time to eat and drink a little more and rest. Go to bed in your tent warm, well fed, and with everything you need set out for tomorrow.
In a tent?
Yes, for four nights everyone has a tent each. They are very comfortable, as long as you are happy getting dressed in a prone position.
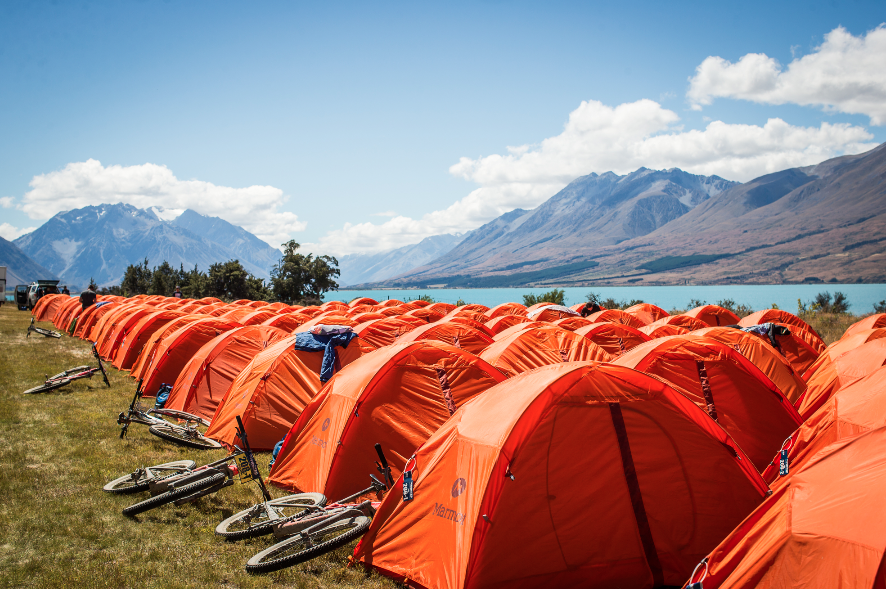
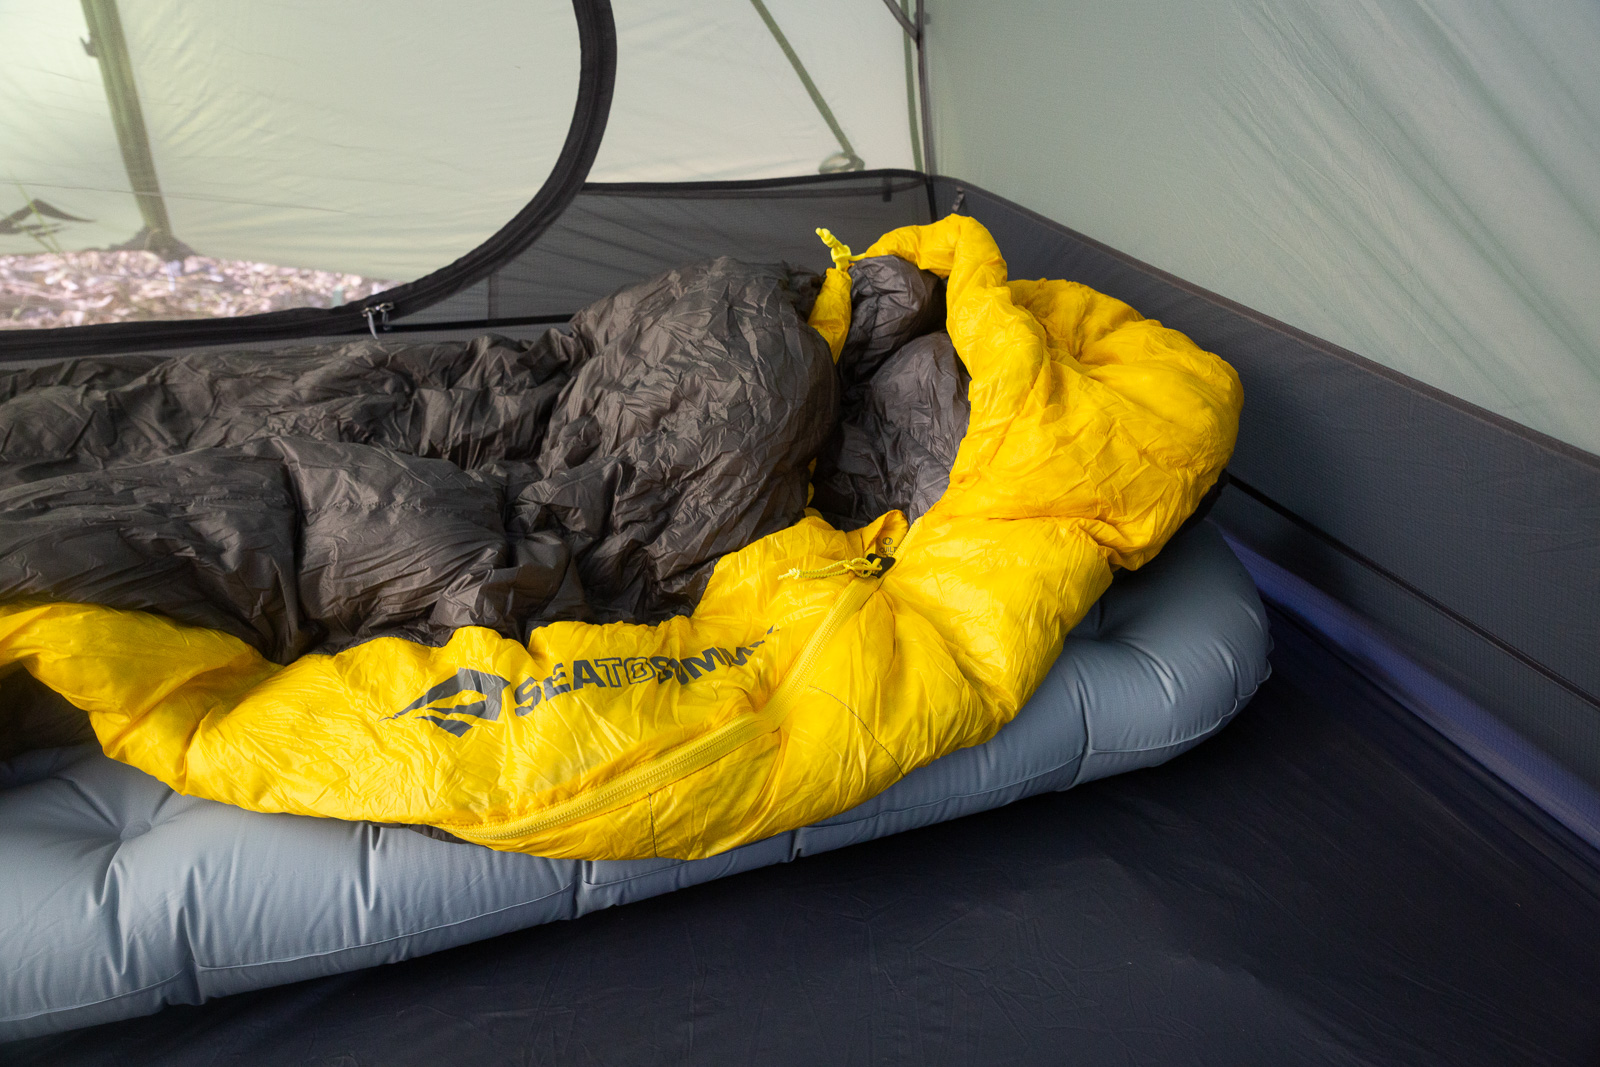
You need to bring your own mattress, sleeping bag and pillow. It pays to make sure these match up with the space you have in a 110L gear bag, and the comfort you need. Most camping stores sell self-flating mats, and grab a sleeping bag that's comfortable to at least zero. Yeah it's the start of summer but Coronet Peak had about 25cm of snow on the same day the prologue is on in 2017. So it can get cold up high. None of the camps are up high but it does cool off.
Having done a number of nights under canvas at races, I've figured out my comfort has more to do with temperature and a pillow than what I'm lying on. So make sure you can regulate the temperature of your sleeping bag, and pack a nice pillow.
Don't neglect earplugs and an eyemask, plus a good head torch. If it's going to be a cool morning put tomorrow's kit (or at least what you'll wear first thing) in the bottom of your sleeping bag so it's warm.
Packing up your gear in the morning can be a bit tiresome so organise your gear into bike clothes, off the bike clothes, wash kit and a dirty clothes bag. Make it easy for yourself.
Do I need more food?
Probably more than you think. The breakfast and dinners are pretty good at The Pioneer, maybe a notch below what has been on offer at The Crocodile Trophy though, especially in terms of quantity for hungry riders.
There are lunch trucks and you'll need to buy your own lunch each day. As the camps aren't remote anymore you might choose to roll into town for something to eat and drink.
Read these nutrition tips for stage racing.
The aid stations have food and drink but of course you need to carry your own. Bars and gels and sports drink are all well and good if you can stomach them, so make sure you try this out in training. I'd suggest aiming to finish with a couple of gels in your pocket each day. Not from running your fuel too lean, but for packing a little extra so you don't run out.
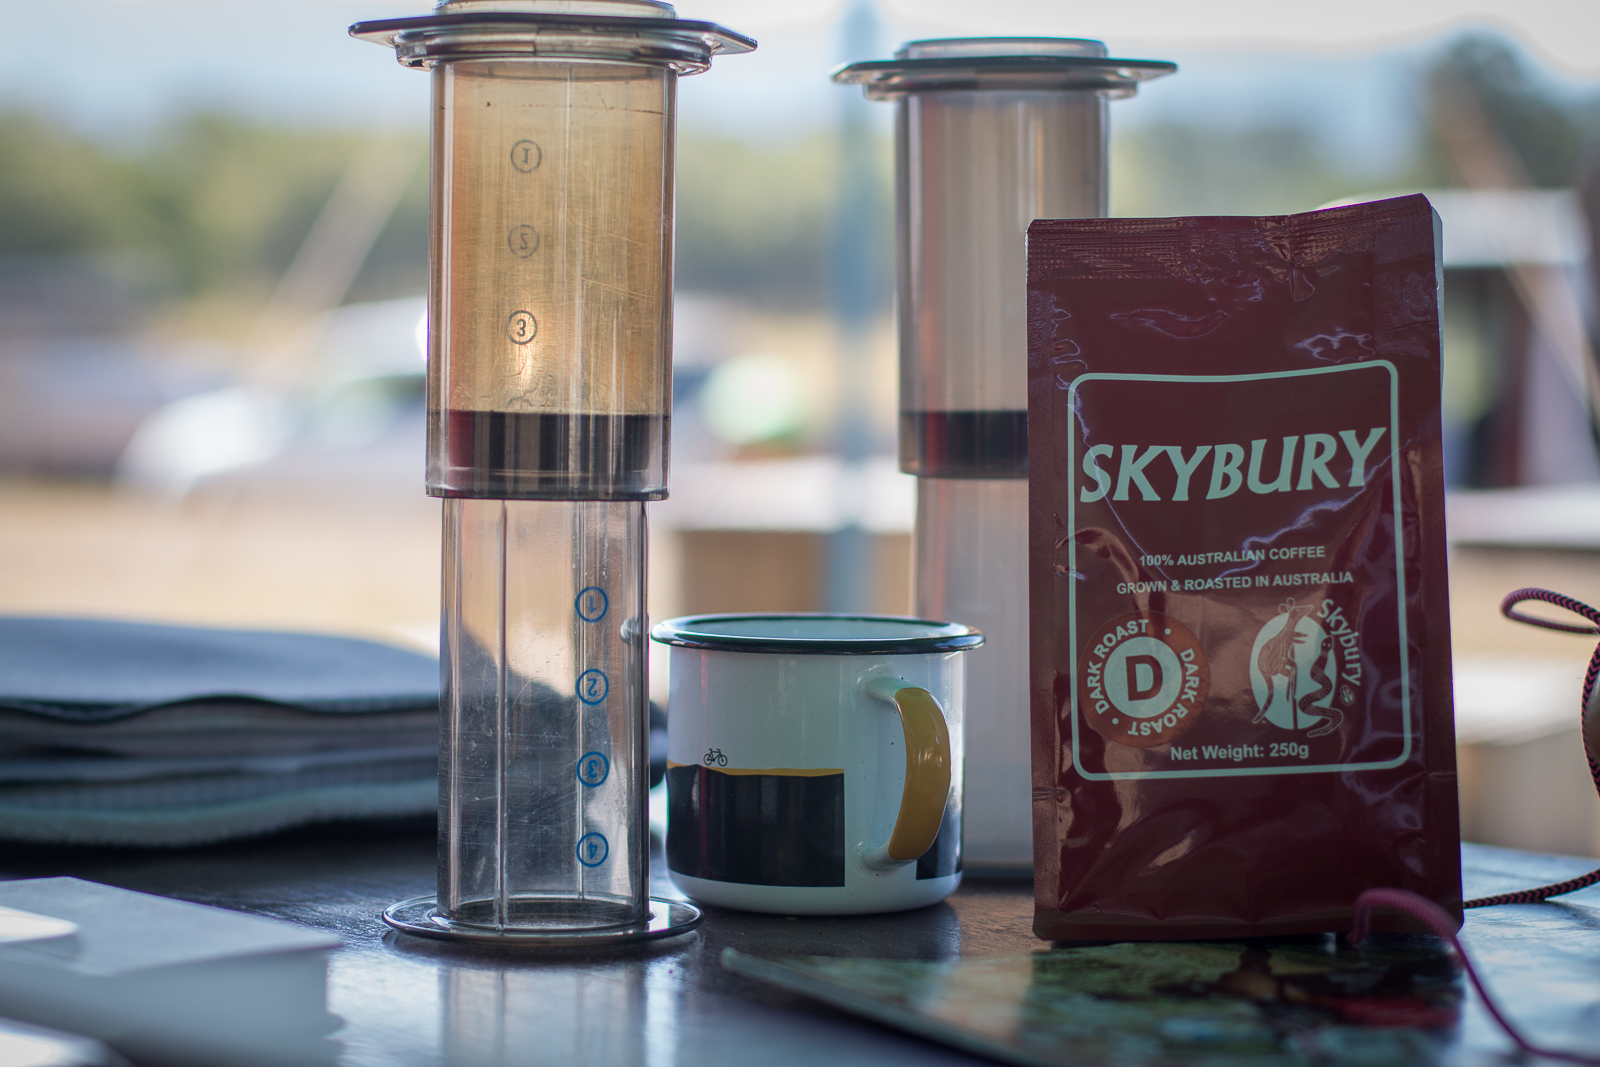
There are a couple of coffee vans in the morning and afternoon, or you can take your own system with an Aeropress. I didn't in 2016 and wished I had, I did in 2017 and used it a couple of times but ordering a good coffee for me and my team mate was a nice part of the morning, with his shout post race. Do what works for you. But hey you could do #coffeeoutside for the better part of a week!
Getting the before and after sorted
The logistics of getting to the start line, and home again, can be tricky.
The Pioneer have pre and post event accommodation options which are pretty plush, and certainly save a lot of time compared to comparing AirBNB, Booking.com. Trivago, availability on a mate's floor or whatever else you were considering. With the race starting on Sunday 25th November you really can't arrive in Queenstown later than the morning of the 24th, so you can register and build your bike. The 23rd makes more sense, taking the Friday off work along with the following week. Then you need to book 3 nights of accommodation, as you still stay in Queenstown after the prologue.
You also need a night after stage 5 in Queenstown – you might even choose to book it at the same place and look at leaving some luggage there. At this point, also think about how you will get your kit bag to the race trucks on Monday for the shuttle to Alexandra for Stage 2. Riding with a 25kg bag on your 10kg bike won't be fun.
Travelling with your bike
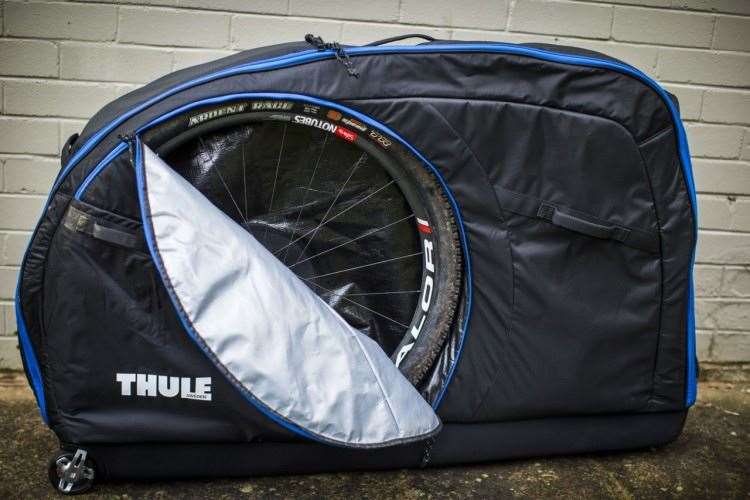
This isn't as bad as you think, just make sure you have the luggage allowance on your flight. Ensure your bike is 'as new' clean for customs, and be prepared to do the same on the way back. A cardboard box will be fine to travel with – or check out the link below for some options with bags.
Don't miss our bike bag buyer's guide.
Just make sure nothing moves in your bike bag, that's usually when damage occurs. Taking off rotors and the rear derailleur adds time to building but it skips a potential headache.
Feeling fresh after the race
There is plenty to do in Queenstown after the race – personally that's for another time as I fly out on the Saturday. But one tip that really helps to feel refreshed after the event is having a completely clean set of clothes and shoes in a kit bag for the finish. It might wait sealed up in your bike bag, but there's nothing like having a proper hot shower after a stage race and putting on completely clean clothes that haven't been in your race bag for a week, before stepping out to party like it's 1999 in Queenstown. Or falling into bed by 9pm – whatever suits.
It really is worth making it to the post-event ceremony. It's a great way to wrap up the experience of completing something as challenging as The Pioneer. Getting through an event like this forges incredibly strong bonds with your team mate and others who shared the experience. It is worth celebrating!
Got more questions? Drop them in a comment and hopefully they can be answered!

